I originally build this telescope in 2005 (version 1.0). The idea was to build a telescope that I could take with me on holidays to far destinations and that I could use as a grab and go instrument. It was a successful build, I used the Egypt, Curacao, Zanzibar, Italy, France and Switzerland. In 2014 I rebuild it (version 2.0).
20 cm f4 newton version 1.0 


On holiday to Greece in 2005 I realized that it would be nice to have telescope you can take with you on flights abroad. When designing the telescope I had a couple of criteria;
– The telescope needed to be carried as hand luggage when traveling by airplane and had possibly fit in a backpack;
– It had to have as little spare parts as possible;
– The telescope had to have its own suitcase in which all the parts would fit;
– The suitcase would have to conform to airline regulations;
– Of course a wanted a little aperture;
– Setup and breakdown of the telescope had to be possible in under 10 minutes.
The choice for a Newton with a short focal length was obvious because of my previous construction experience and because of the simplicity of the design. Trusses are also a major component and are sometimes a problem (unless they are retractable). Since I already had previous experience with making strings, the travel telescope would be a string telescope. I bought a 20 cm f 4 mirror, matching secondary and secondary holder and started building.


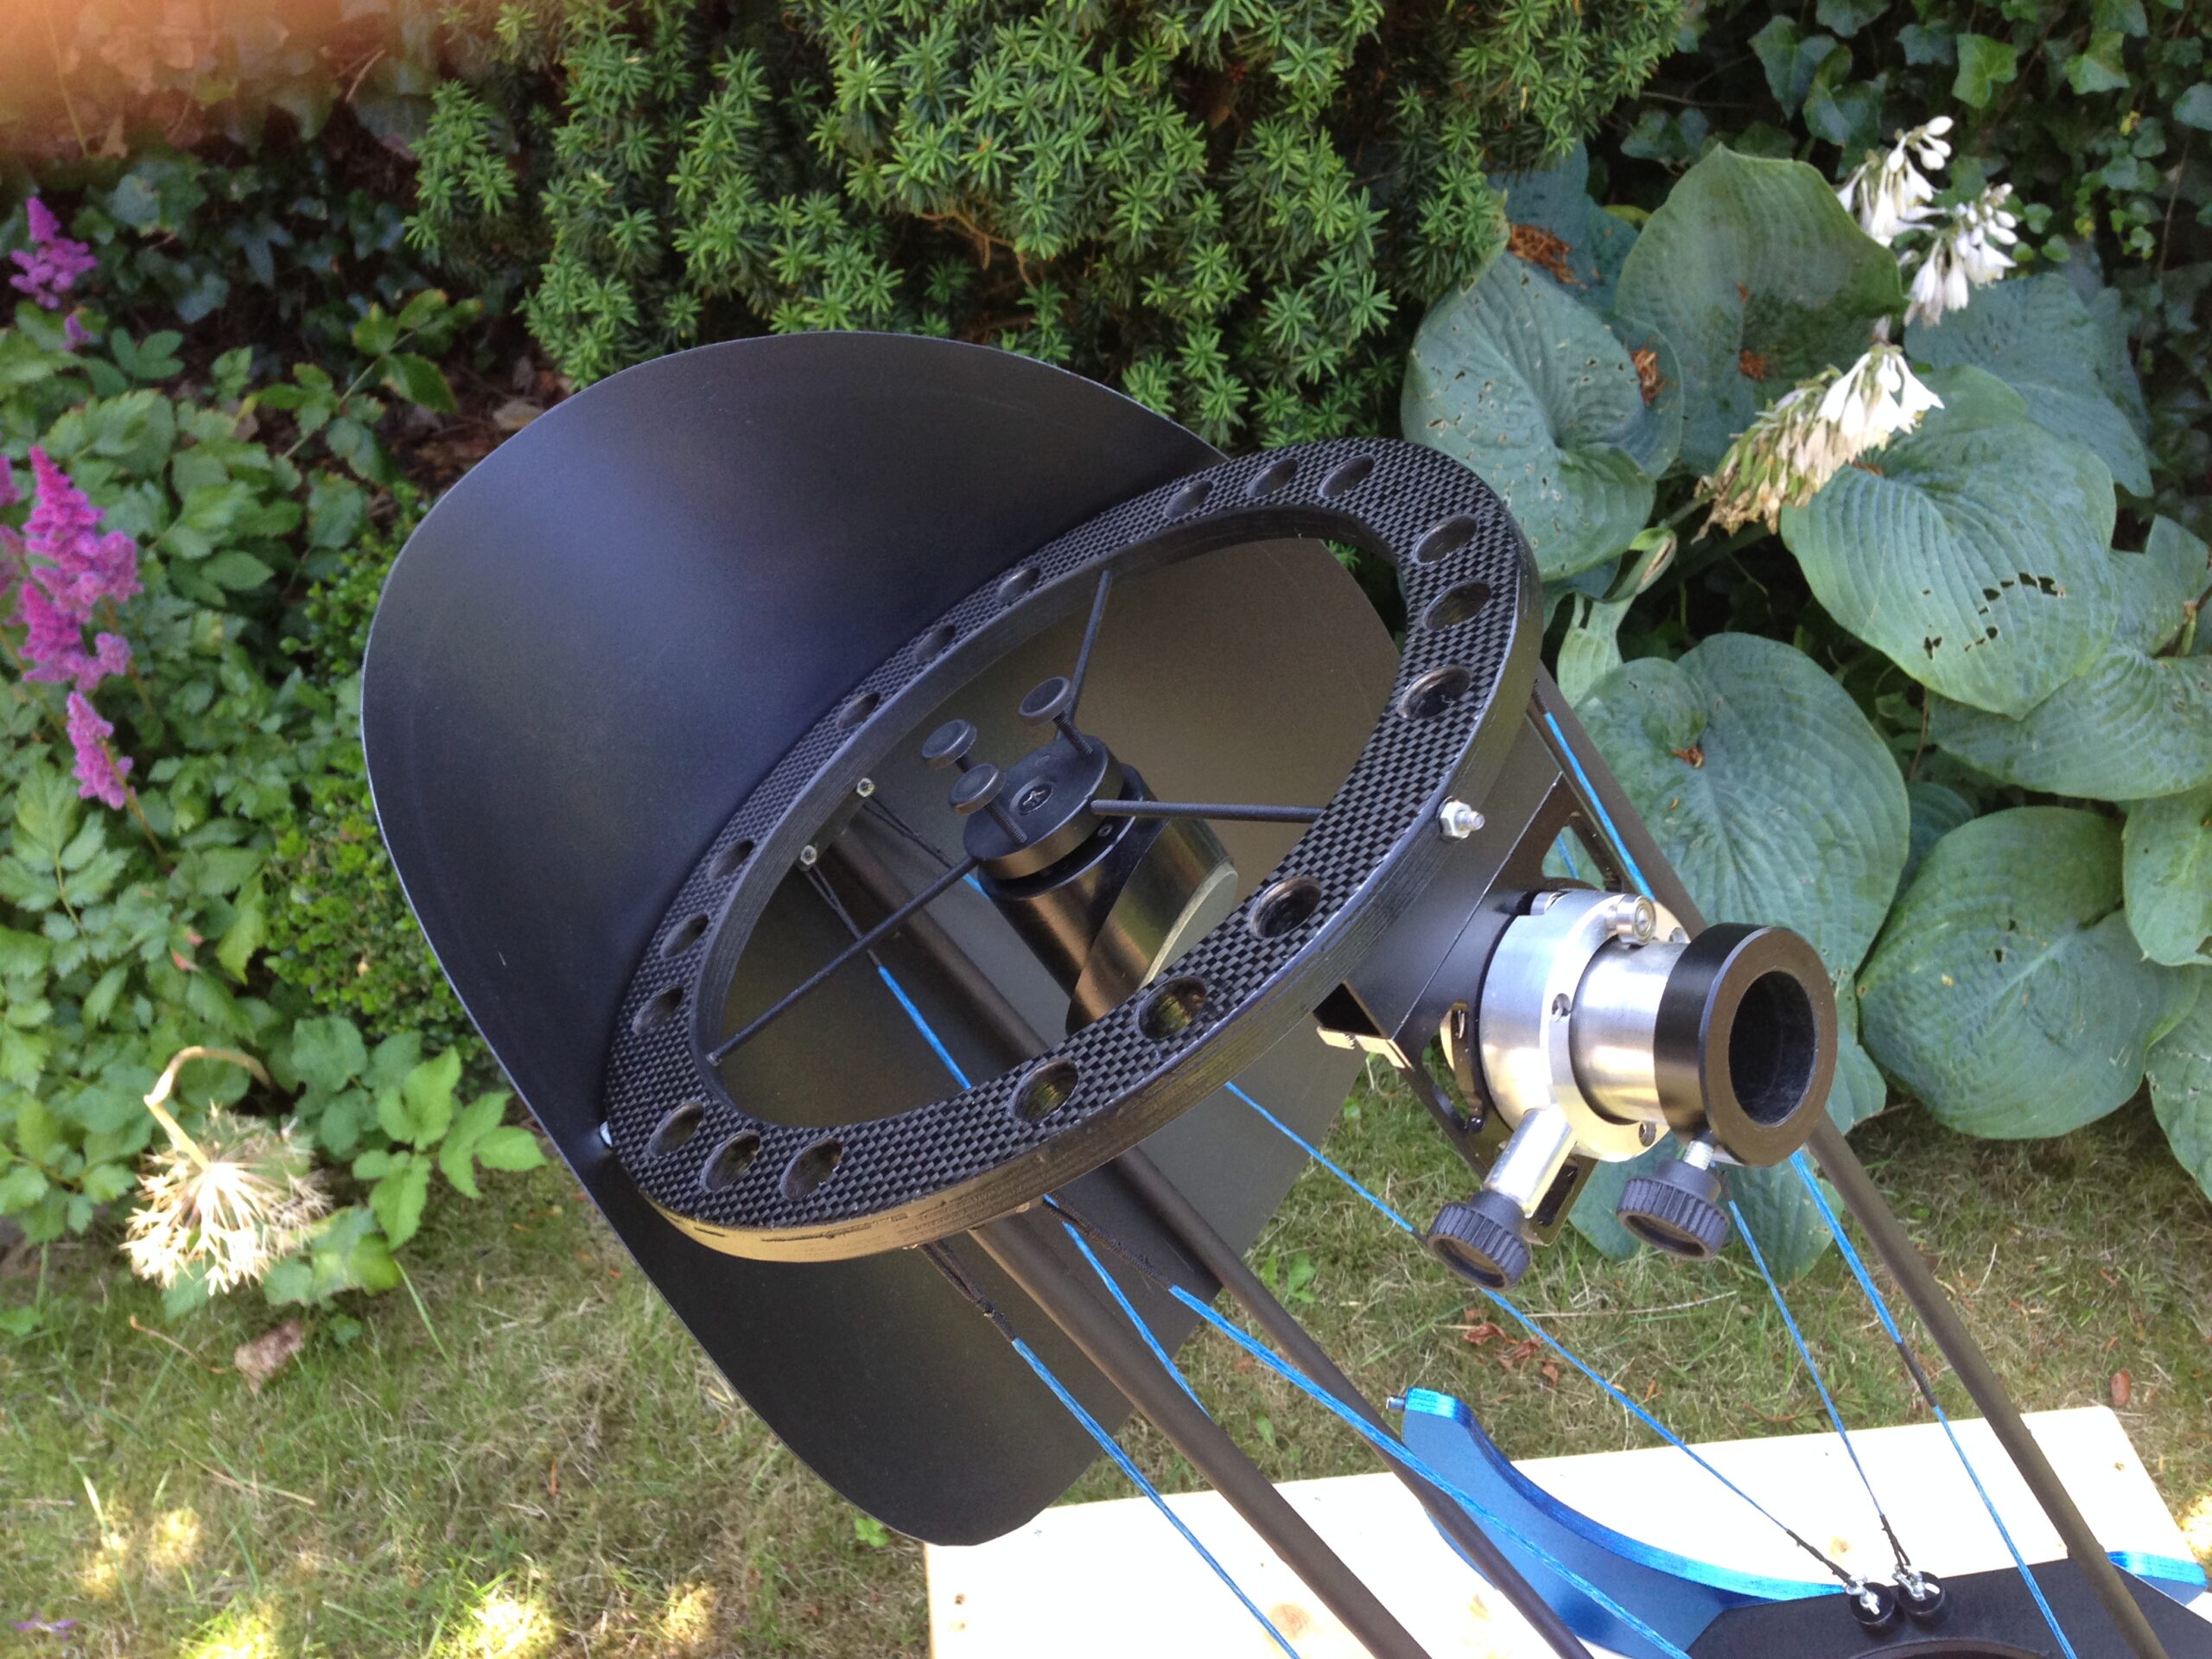
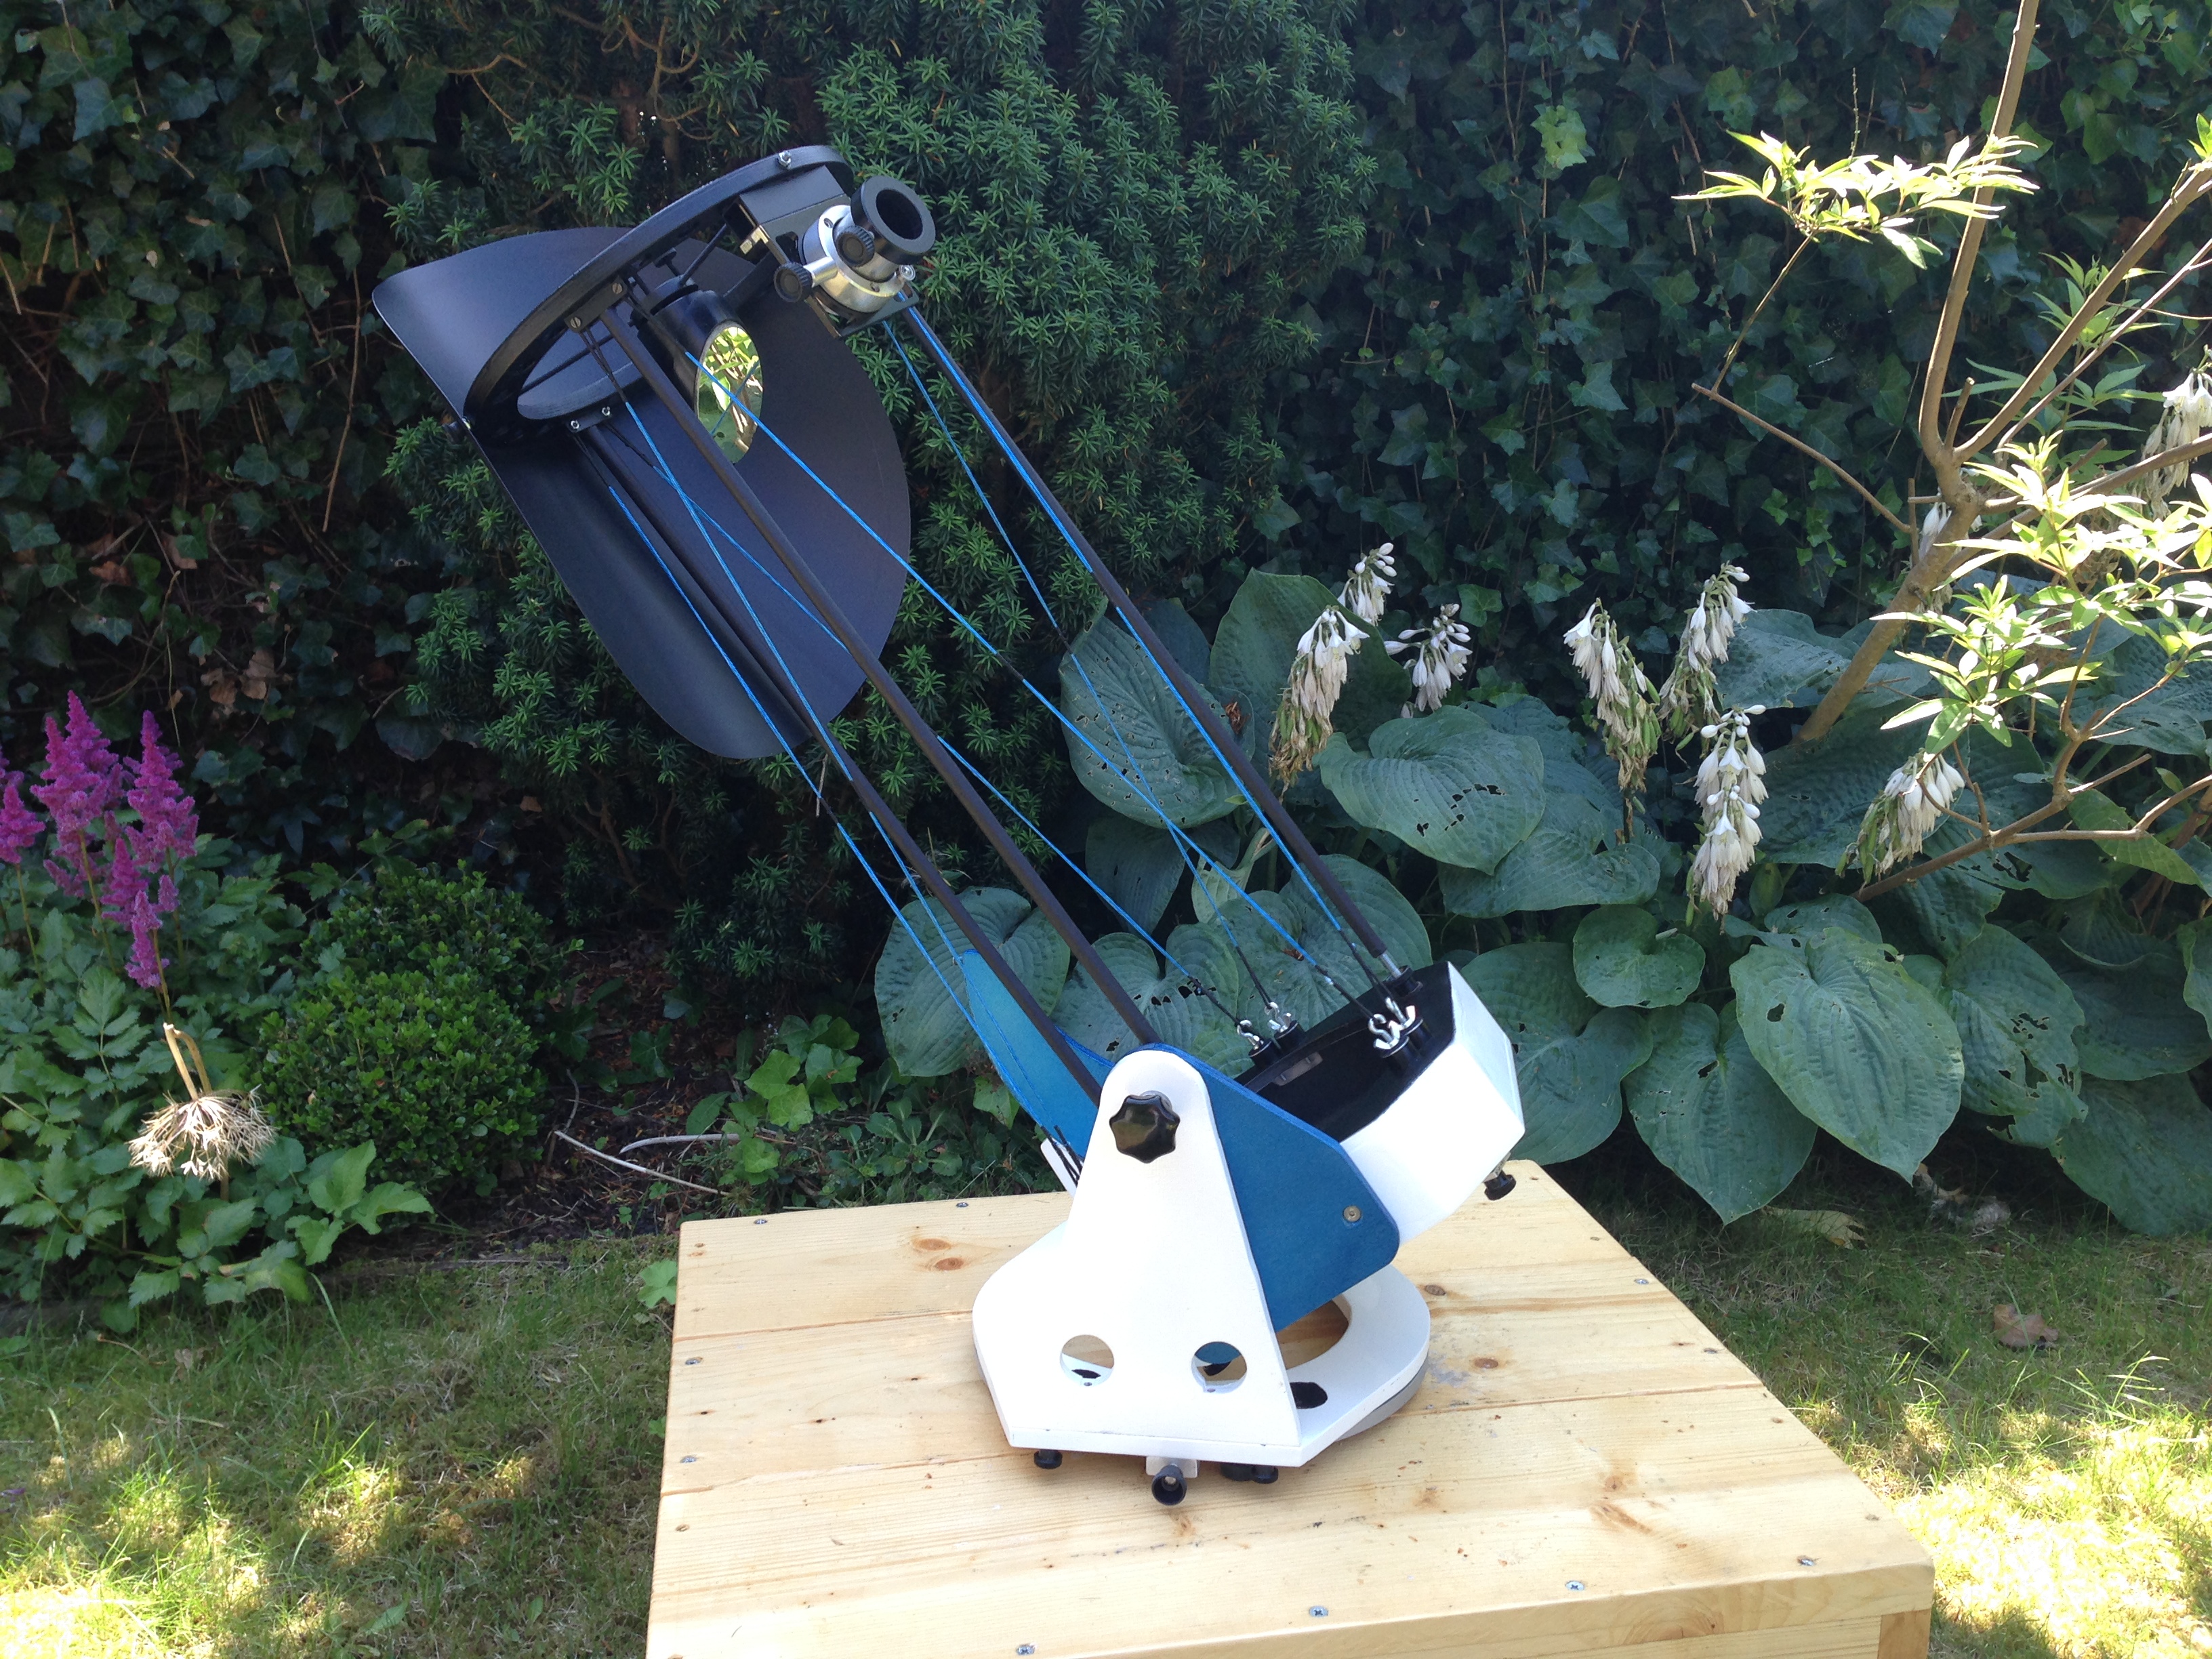
Secondary ring
The secondary ring consists of 3 U-profile sections and pieces of plywood that form an asymmetric hexagon. This is a very thin secondary ring which performs perfectly despite my initial reservations with regards to rigidity. The vanes of the spider are a little thicker than usual (3mm) which adds some extra stiffness. The focusing device is a simple plastic thing that is permanently attached to the plywood focuser board with epoxy.
Strings
The strings are made BCY 450 + bow thread with a “serving jig and are wound 4 times. Because the threads are zero-stretch vibration is practically nonexistent. If, while observing at a magnification of 200x one tapes the telescope, there is hardly any vibration in the image. The strings are semi-permanently attached to the secondary ring. They are adjustable in height, but collimation is done the traditional way through adjusting the secondary. The poles are shopped up Nordic walking poles and are retractable for transport. They have a threaded rod that’s epoxied in the tube. Unscrewing a nut lifts the pole and tensions a pair of strings.


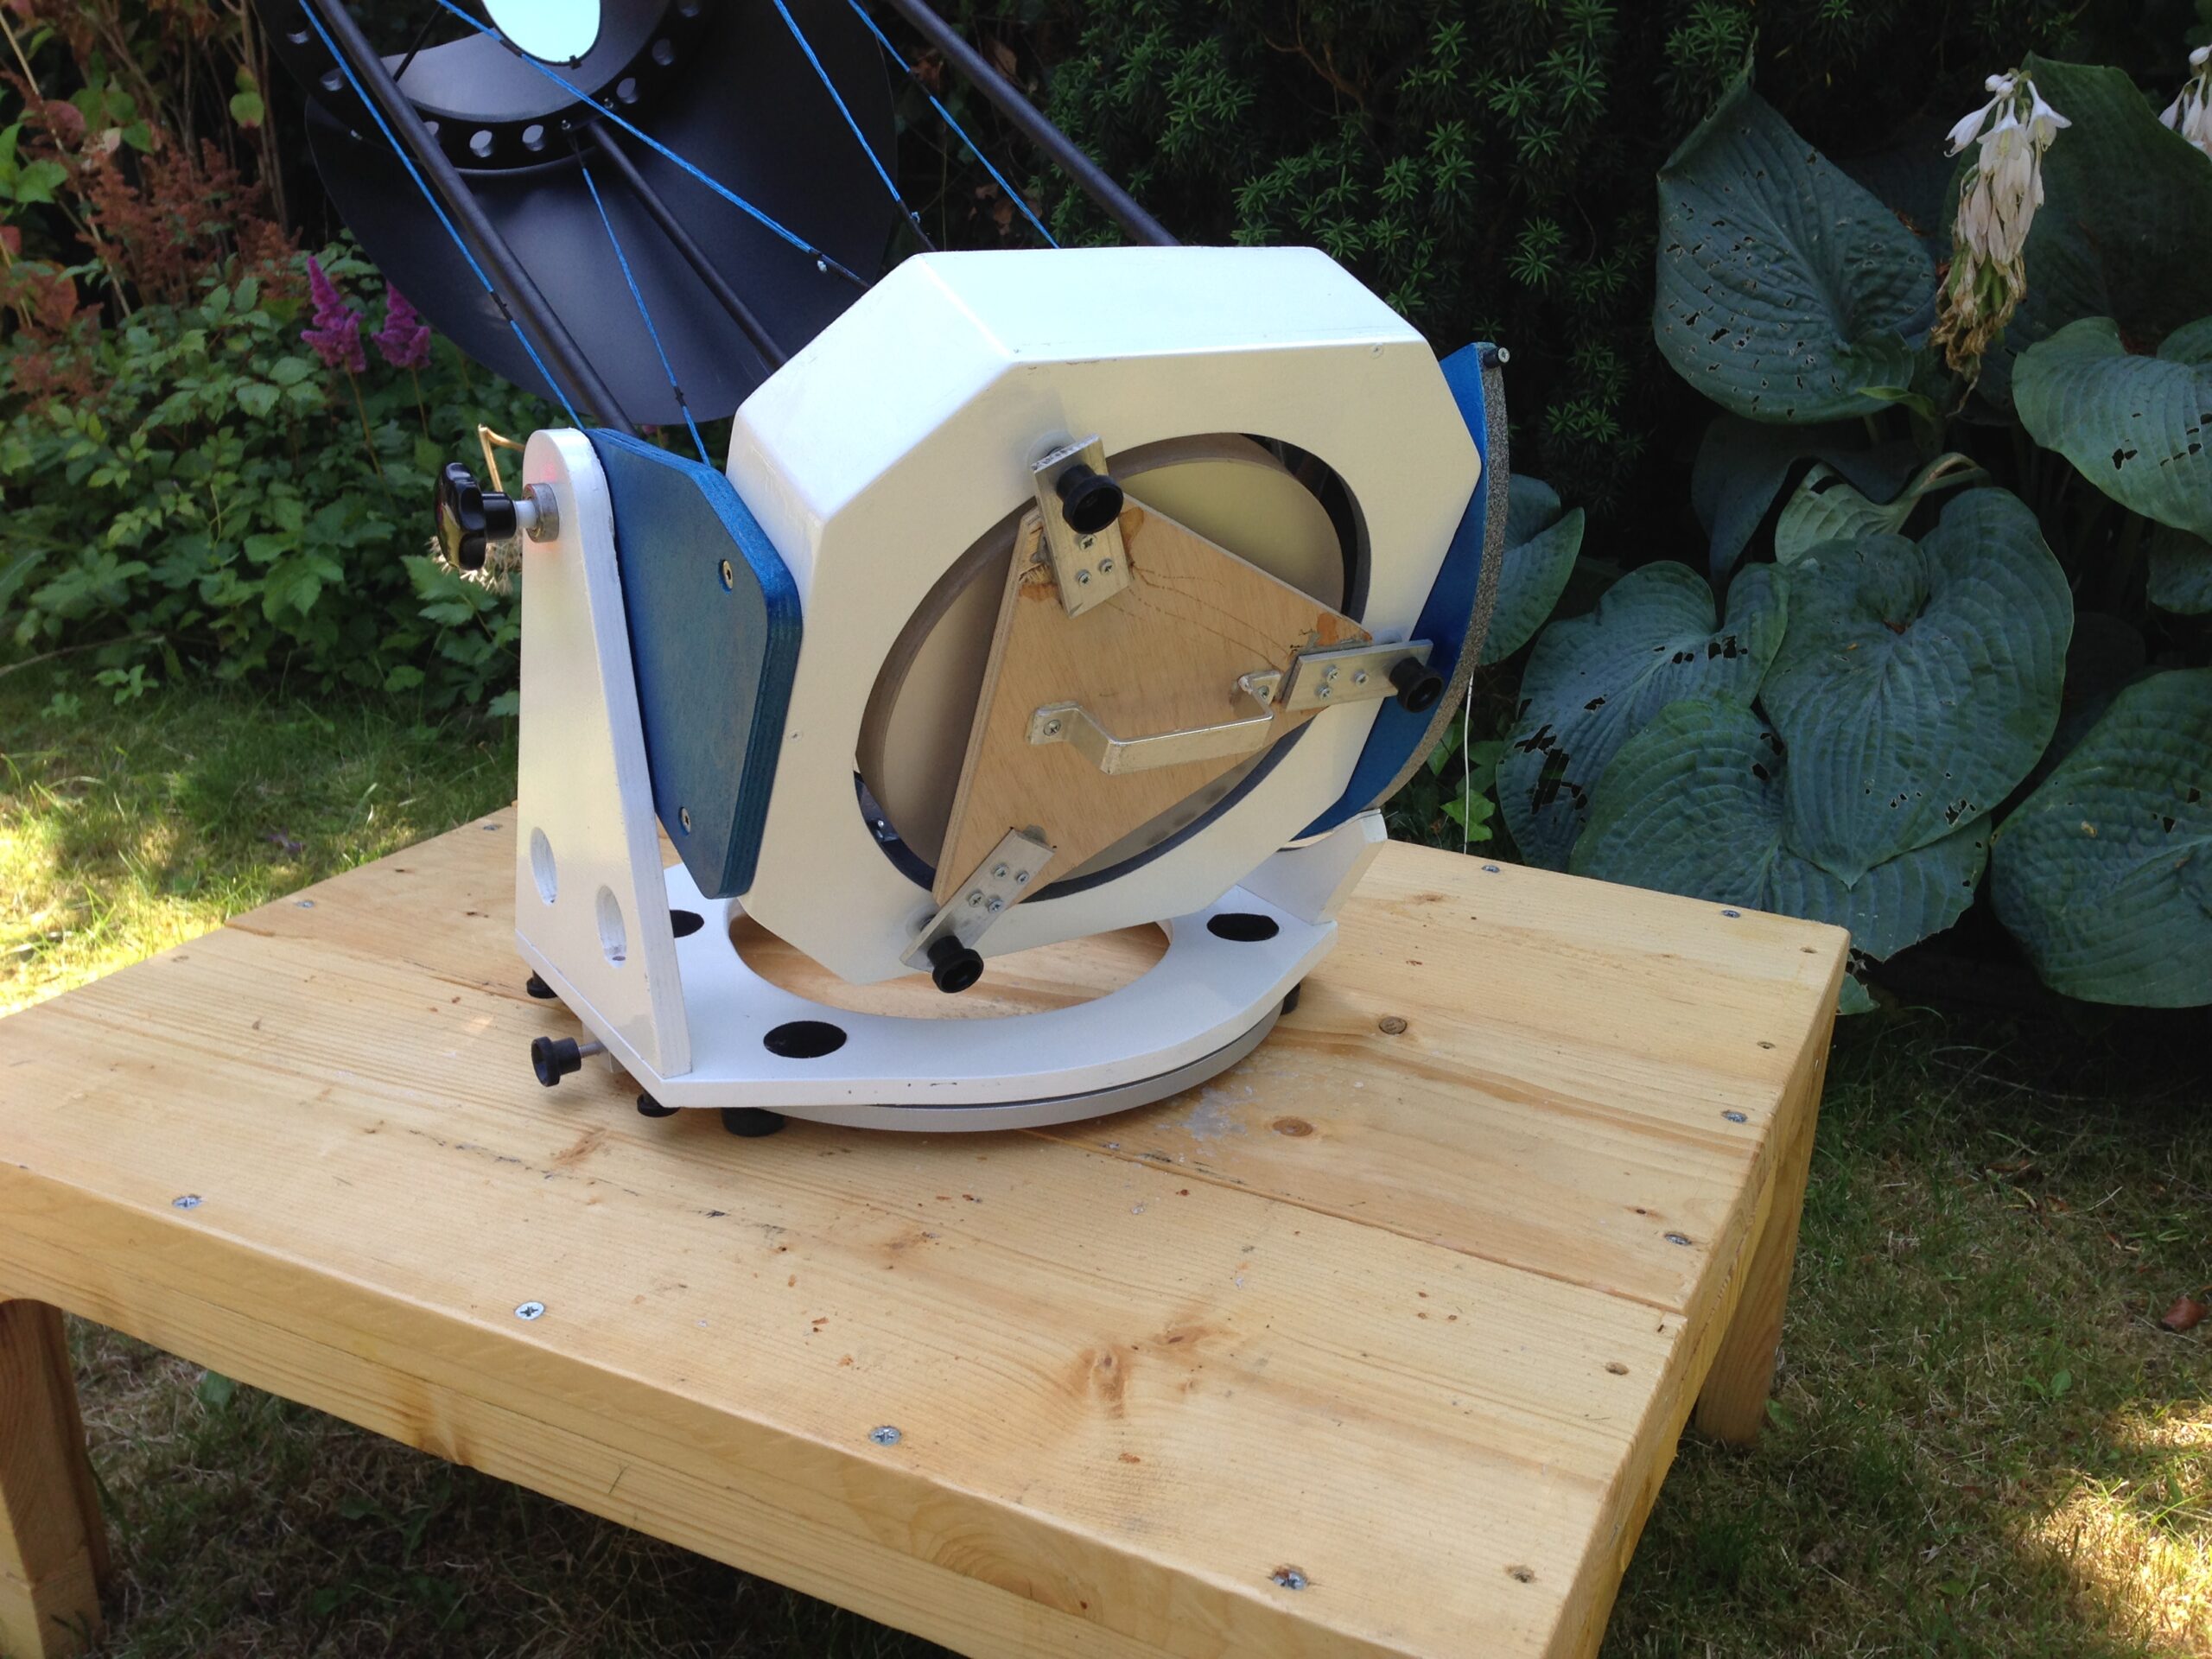
Mirrorbox
The mirror box is made of 6 mm and 9 mm (top) birch plywood. I chose a box because this gives some protection to the mirror and leaves room for the components in the box. A more open design also has little weight advantage in a telescope of this size. The inside of the box is lined with thin type of foam that I also use as a light shield behind the secondary mirror. The primary mirror is glued straight to the holder with three drops of silicon glue, the pressure points where calculated with Plop.
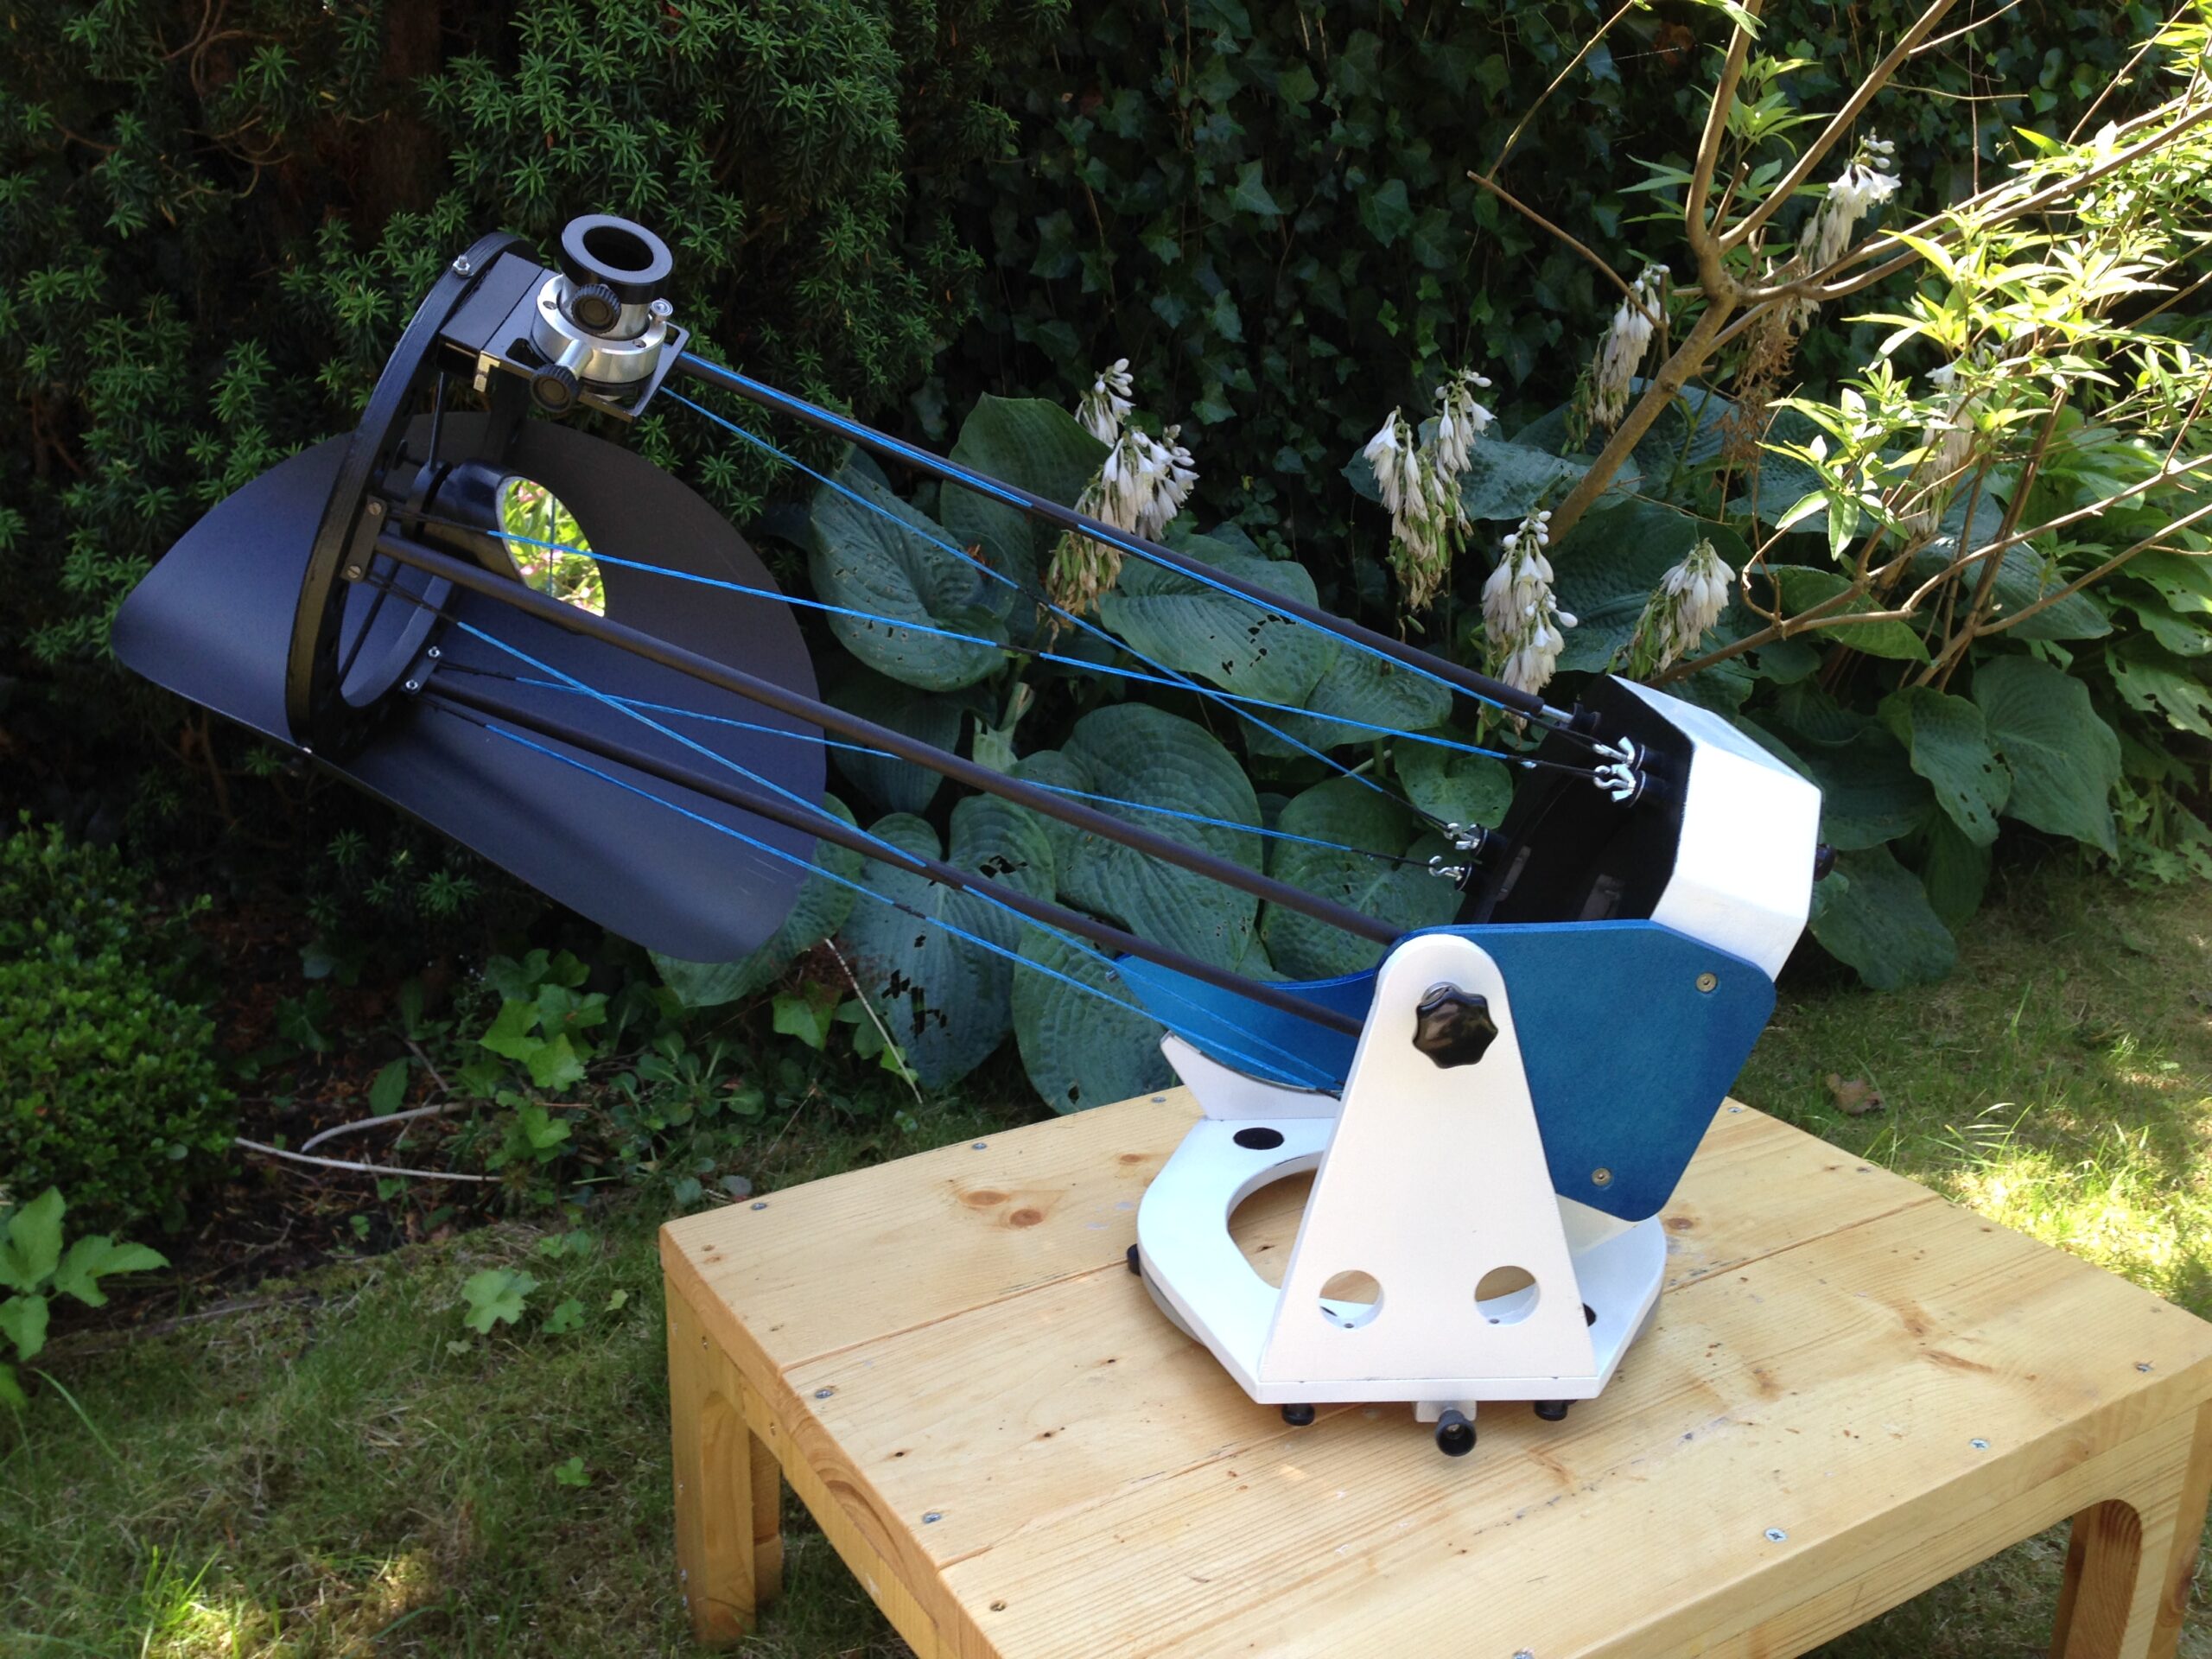
Mount
The mount of the telescope is perhaps best described as an asymmetric Dobson mount. With smaller light Dobsons there is a risk of lifting the OTA when pushing against the telescope. In commercial models this is solved by adding a spring. In my telescope, the axis on the observers side is a fixed point. This keeps the telescope stable but he still preserves the qualities of a Dobson. The side bearing has a ebony star glued to the edge and rides on Teflon. The slip on the other alt-axis is adjustable by a rotating a knob to create more friction between a piece of a Teflon plate and Formica. This is especially useful because the weight difference between the eyepieces that I use. In addition, the laser that’s attached to one of the poles is movable, to balance the telescope.


Rockerbox
The rest of the rockerbox consists of a cross with wheels attached to the end. It rests on a central circular plate which has slip resistant material which keeps the telescoop from moving around on the ground. The central part of this is connected to the cross via a Telfon disk. The circular plate also serves as a cover for the mirror box. The wheels are just touching the floor and do not bear the whole weight of the telescope. The rocker works very well, upon arrival at a location one just needs to find a flat surface.


Using the telescope
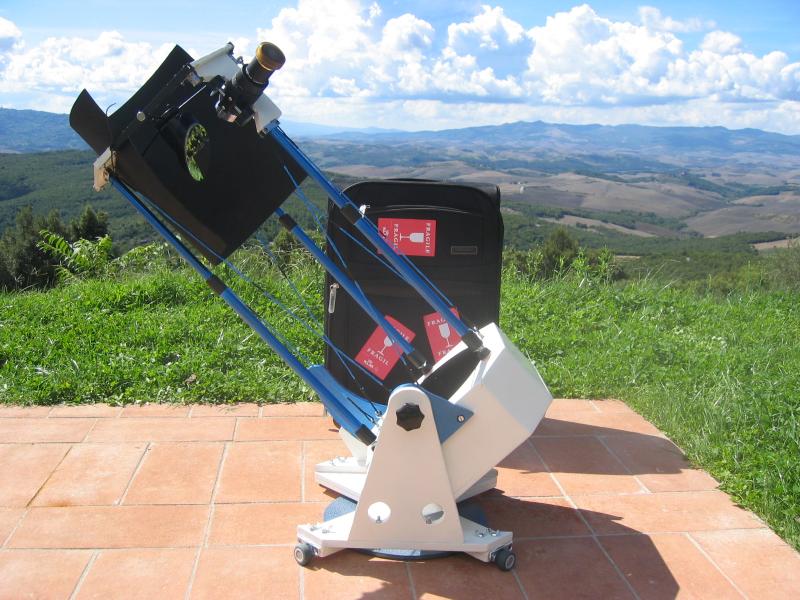
The case, a standard hand luggage case, was reinforced with foam and plywood to make it more rigid. There is room in there for all parts of the telescope including eyepieces, charts and a small laptop. First light was in May 2006, in my backyard, the heart of Amsterdam. The optics by GSO where much better than I expected. After several nights in the field I did however come to the conclusion that I need to improve some aspects of the telescope in the future. The setup of the telescope takes too long, mainly because of the amount of parts needed to construct the secondary ring. Once thats done, the telescope is up and running in under a minute, but to get it back in the case takes too long. The mount works just fine and tolerates high magnification well. Collimation is a matter of seconds with a Cheshire eyepiece. My first real trip (to Italy) with the telescope was a blast.
20 cm f4 newton version 2.0
 After using version 1.0 of this telescope for a number of years. I wanted to correct some flaws in the original design. So in 2014 I rebuild parts of the telescope. The main problem with version 1.0 was that it took me about half a hour to setup the telescope. This was mainly due to the complex secondary ring and the collapsable alt-az base. Also the focuser was not up to par.
Secondary ring
The secondary ring of version 1.0 consisted of segments that were put together with small nuts and bolts. The new ring is a single piece out of 12 mm plywood that is reinforced with several layers of carbon. The new focuser is a rotating type and can be detached for transport. The new lightshield is made out of Kydex and is less prone to flapping around in windy conditions.
Mirrorbox
When I designed version 1.0, I initially intended to use the mirrorbox for storing the secondary mirror, focuser and parts of the alt-az mount. Although everything fitted in the suitcase I was using for transportation, the mirrorbox was a little cumbersome. For version 2.0 I shortened the box by a few centimeters and added larger bolts for attaching the strings. I also added a small counterweight on the bottom of the box too balance the scope for larger eyepieces.
The alt-az mount
Although the first mount was working perfectly well, it was a bit of a nightmare to assemble and disassemble. The new mount is much easier to take apart. I also has a slip mechanisme so I can vary the amount of drag on the azimuth.