
<<<<Secondary & Mirror box
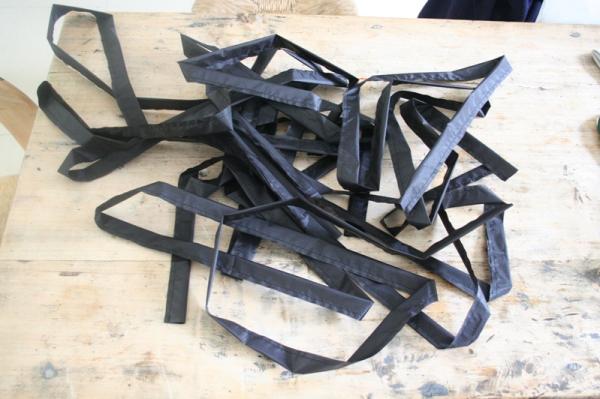
Strings
The 6 strings are made of zero stretch string. Like most ATMers I use BCY 450 PLUS archery string which is normally used for make bowstrings. A single thread of this type can handle a force of about 2.5 kg. I doubled the threads 8 times to create a string that can handle a force of almost 40 kg. All strings together can handle a force of 240 kg, which much more than is necessary. However, it is better to be safe than sorry.
When making a string it is paramount that all threads in string are equally tensioned. To achieve this I used the method archers use to make bowstring. Archers use an ‘endless bowstring jig’ to make their bowstrings, this is a tool that is easily made (see figure16) by any ATMer. I made mine in about an hour[1]. It consists of a central beam with two arms with two posts. The arms can turn and one can also be moved along the length of the beam. To make a string you basically wind a thread several times around four poles. Then you use serving string (nylon thread) to make loops on both ends and to bundle the wires into one string.
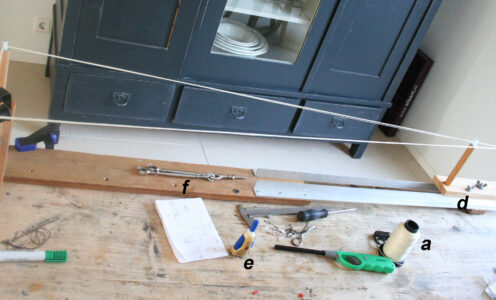
Figure 16
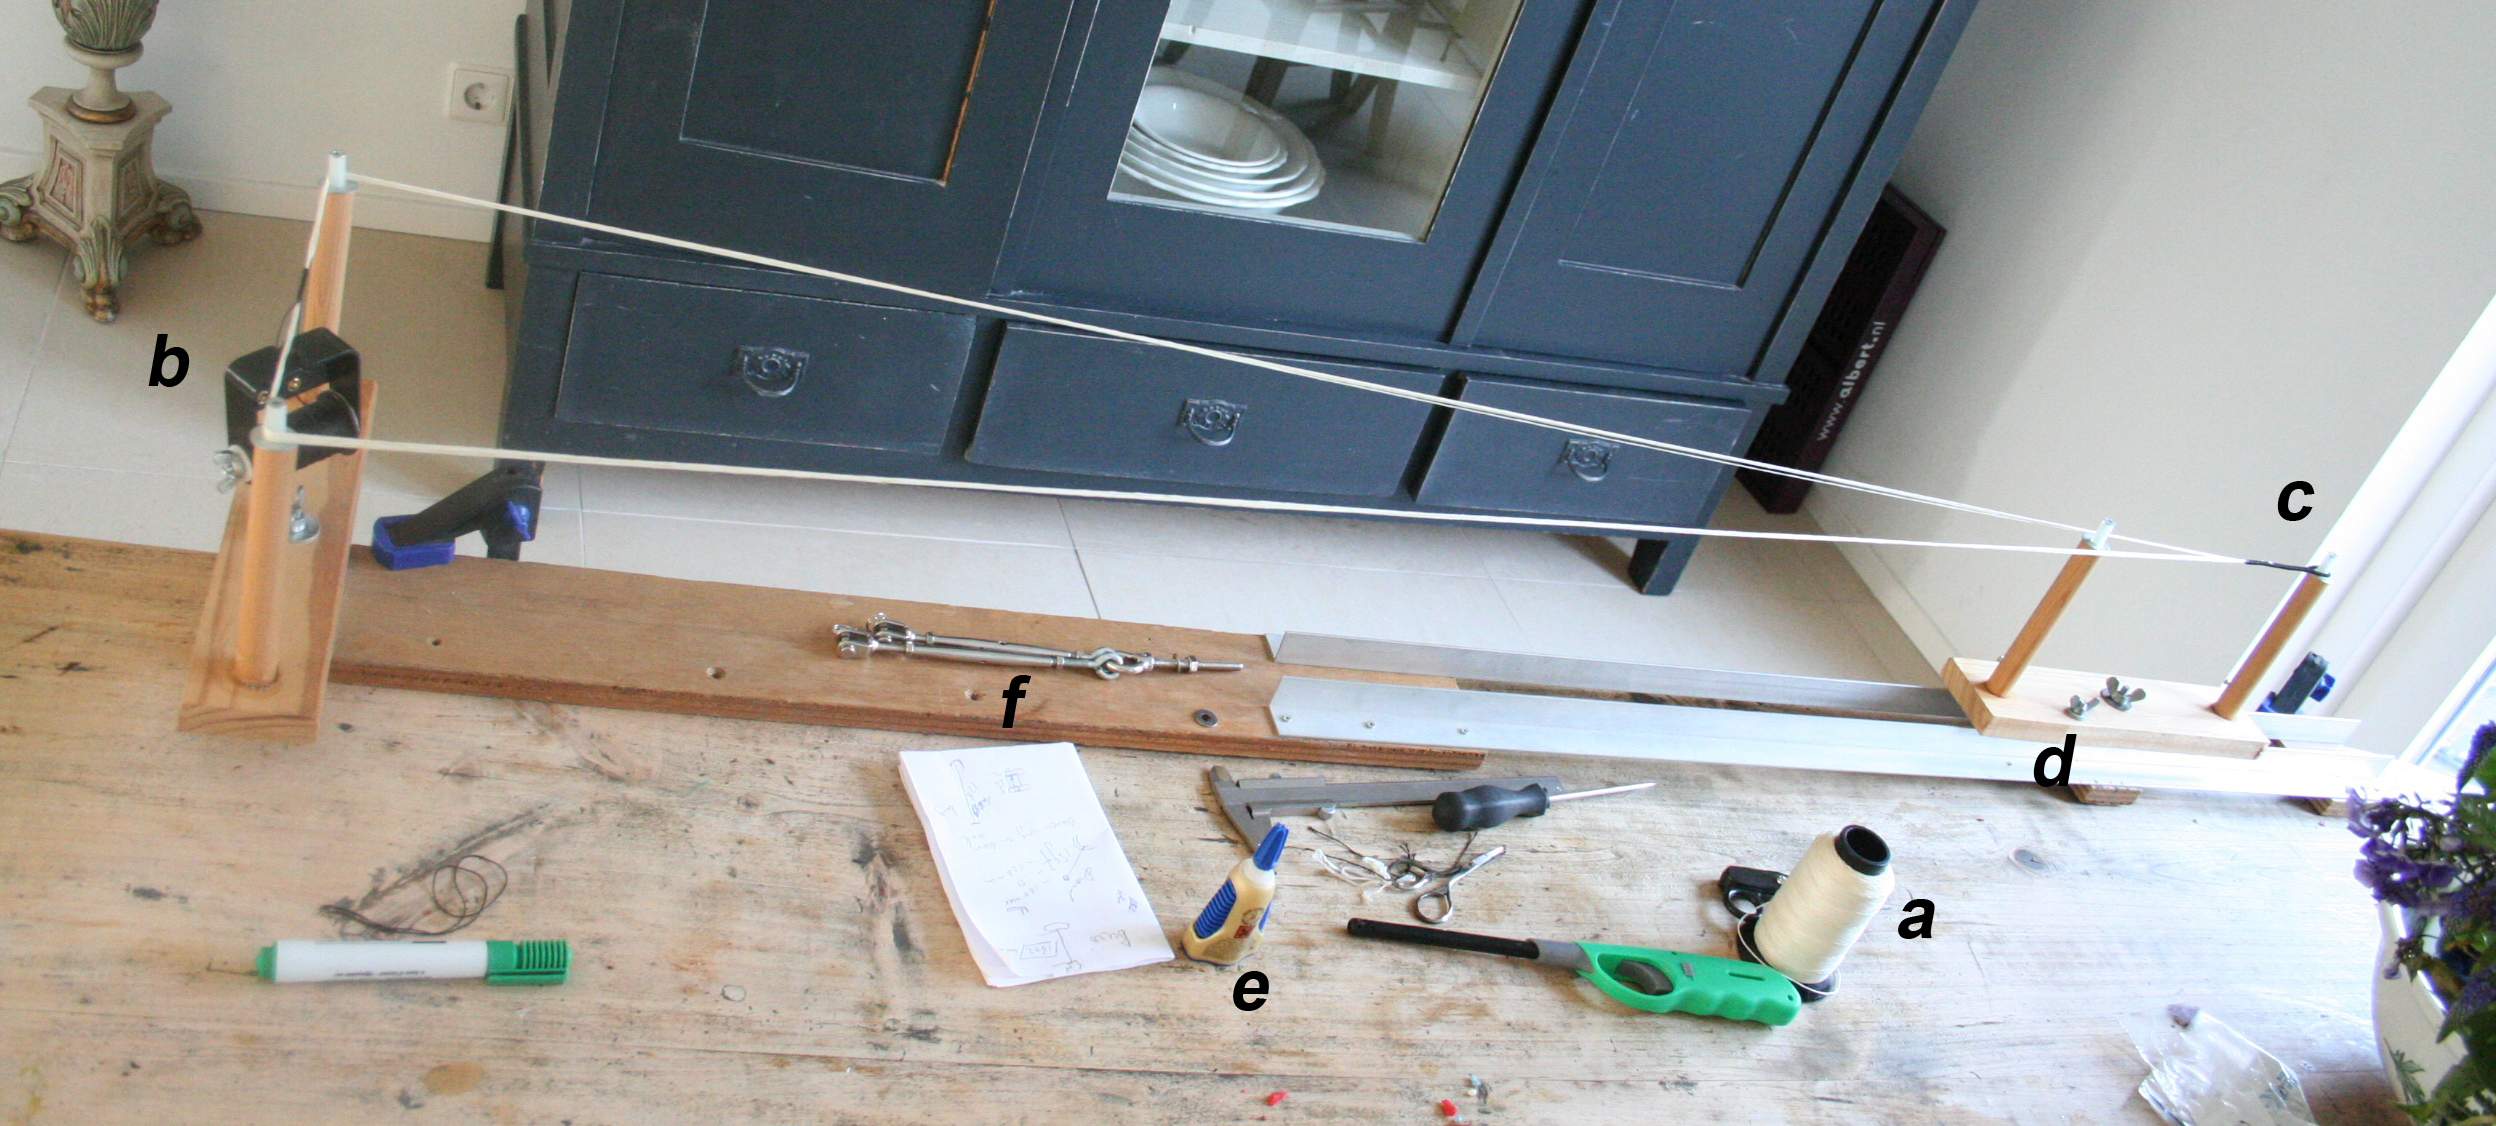
To make your own strings you will need the following items:
- Bowstring fiber, preferably BCY 450 Plus (a in figure 16);
- Serving nylon, not the braided type (thread b in figure 16);
- An endless bowstring jig, with one or two arms (figure 16);
- A serving jig (tool b in figure 16);
- Scissors and superglue (e in figure 16).
Extensive instructions on making bowstrings can be found on the internet. With a little practice it takes about 30 minutes to make a string. The basic procedure is as follows:
- First, set the arms parallel to the main beam, keeping the arm string post side that has the small wing nut as the string post outside. Then measure – from the outside edge of the arm’s post to the outside edge of the other arm’s outer post – the length of the string you wish to make. Tighten down the large wing nut on the jig’s movable arm;
- Tie on the first string the inside post of the movable arm;
- Keeping even tension on the fiber as much as possible (not too loose or too tight). Then spin the fiber around the arm’s outer post, then down to the other arm’s outer post and back – this completes one loop. Do this for a total amount of loops you may require. It is very important not to let the string fiber strands overlap each other on the posts. They should lie above each other. Then, at the end of the final loop, go around the movable arm’s outer post for one full turn and pull the end down to the tie post, loop around once, lock down with the small wing nut (d in figure 16) and cut off ;
- Now, loosen the large wing nut of the moveable arm and move/turn the main arm so that it’s at 90° to the main beam;
- Apply tension to the string by pulling back on the main arm – tighten the large arm wing nut;
- Now start making the first bowstring loop. For this you use the nylon serving threads and the serving jig (b in figure 16 and figure 17). Serving means winding nylon wire around the bowstring. First push the loop serving wire through strands of bowstring;
- You’ll be serving the loop from left to right, and the server will wrap from bottom to top. Make sure that the thread comes off the serving spool to your left (see figure 17). Start a few wraps;
Figure 17 Serving with the serving tool

- Serving takes a little practice. Getting the right serving tension is a question of trial and error – again not too loose but definitely not too tight. There must be some amount of tension, but you don’t want the resulting serving to be as hard and stiff as wire, otherwise you will not be able to bend it into a loop. Serve for a distance of about 10 cm;
- Keeping the serving jig up against the serving, loosen the arm’s large wing nut, remove tension on the string, loosen the arm’s small tie-down wing nut (d in figure 16);
- Set the arm parallel to the main beam. Adjust the distance of the string jig serving spool from the outer edge of the string post – this determines the size of the string loop. I usually set it for a 3 cm long loop;
- Close the loop by continuing to serve; Typical loop ends are served from 15 cm to 20 cm. After 10 cm have been served, carefully cut off one of bowstring’s ends, after another 3 cm is served, cut off the last bowstring tag end, then continue to serve to the desired length;
- Whip the end of the loop serving. I like to use the pull-through method. Use a length of serving material to form a loop. Slip the loop underneath the serving and serve over the loop for 4 or 5 turns;
- Maintain tension on the serving thread, snip off, slip the thread end into the whipping loop and pull through;
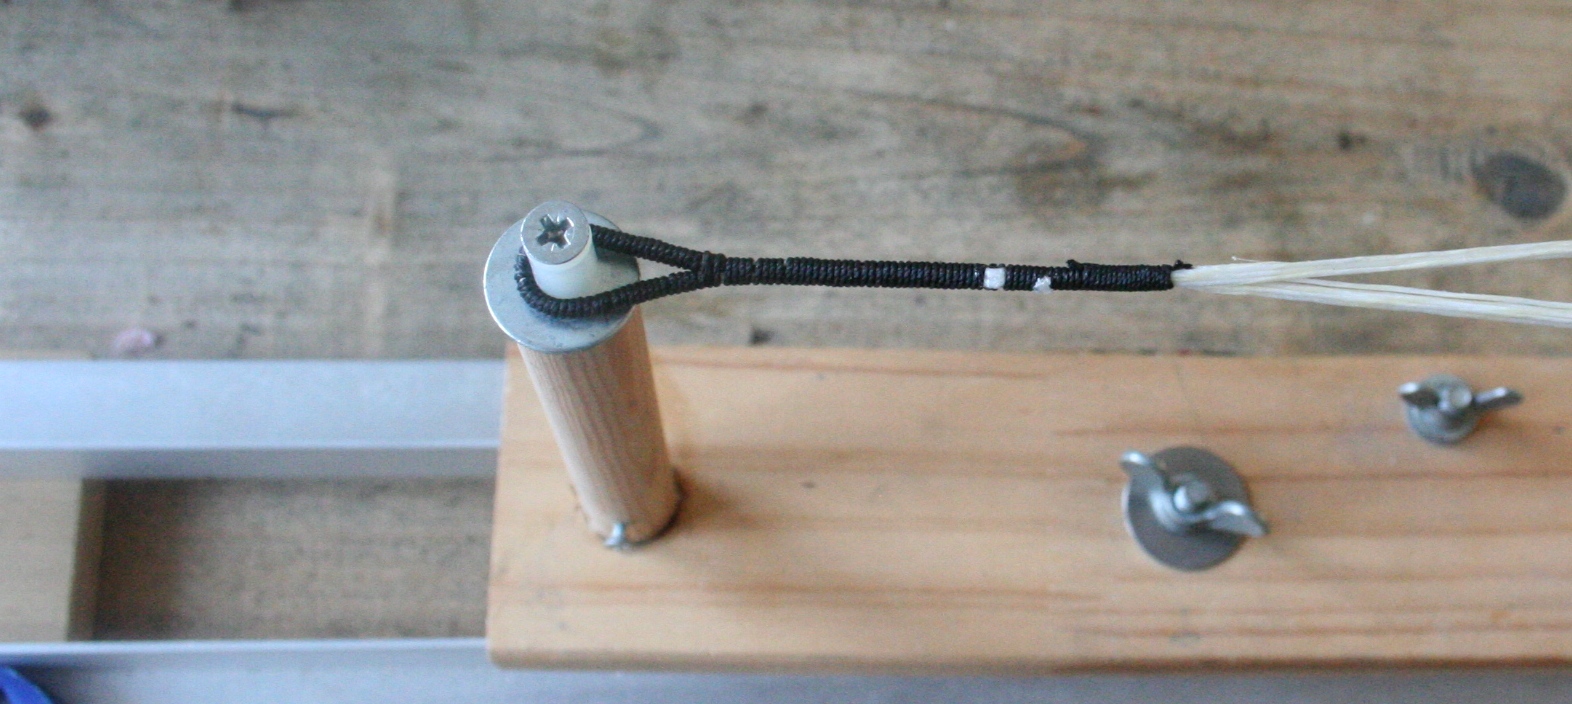
- Pull the whipped end tight and carefully cut off the tag end close to the serving. One bowstring loop is now completed (see figure 18);
- Loosen the large wing nut on the non moveable arm and turn it 90°. Start the serving procedure for the second loop. This procedure is the same as for the first loop;
- After finishing the second loop the bowstring now consists of 16 threads that can be tensioned equally. To keep the threads neatly together I usually use serving to bundle the threads at three spots along the bowstring. Also I use glue on the knots to make sure the serving does not come undone.
Figure 18
Turnbuckles & Trusses
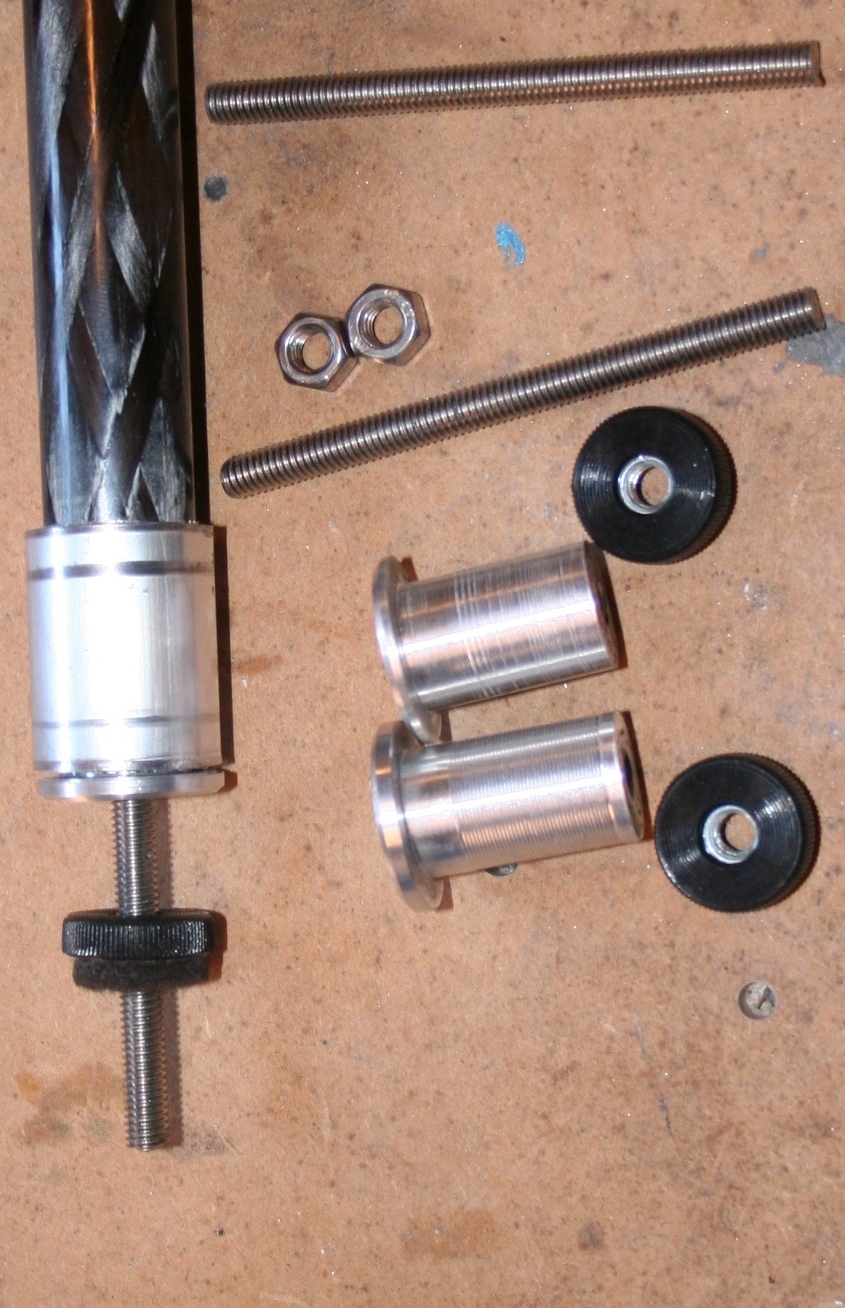
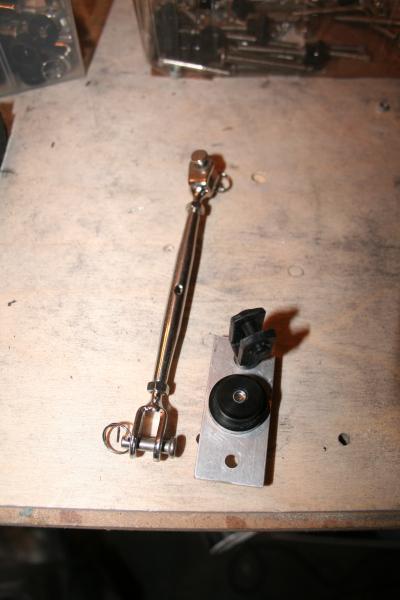
Since its impossible to make all 6 strings of equal length some sort of mechanism is necessary to adjust the length of the string. Otherwise it would not be possible to adjust position of the secondary ring. I use RVS M5 turnbuckles (see figure 19 and f in figure 16) that are normally used on sailboats. Since the weight of these turnbuckles is on the mirror box side, they do not influence the balance of the telescope negatively. The turnbuckles are only set once, when the position of the secondary ring is fixed. Soft black foam is wrapped around the turnbuckles for protection of the primary mirror and eliminates reflections on the metal.
Figure 19
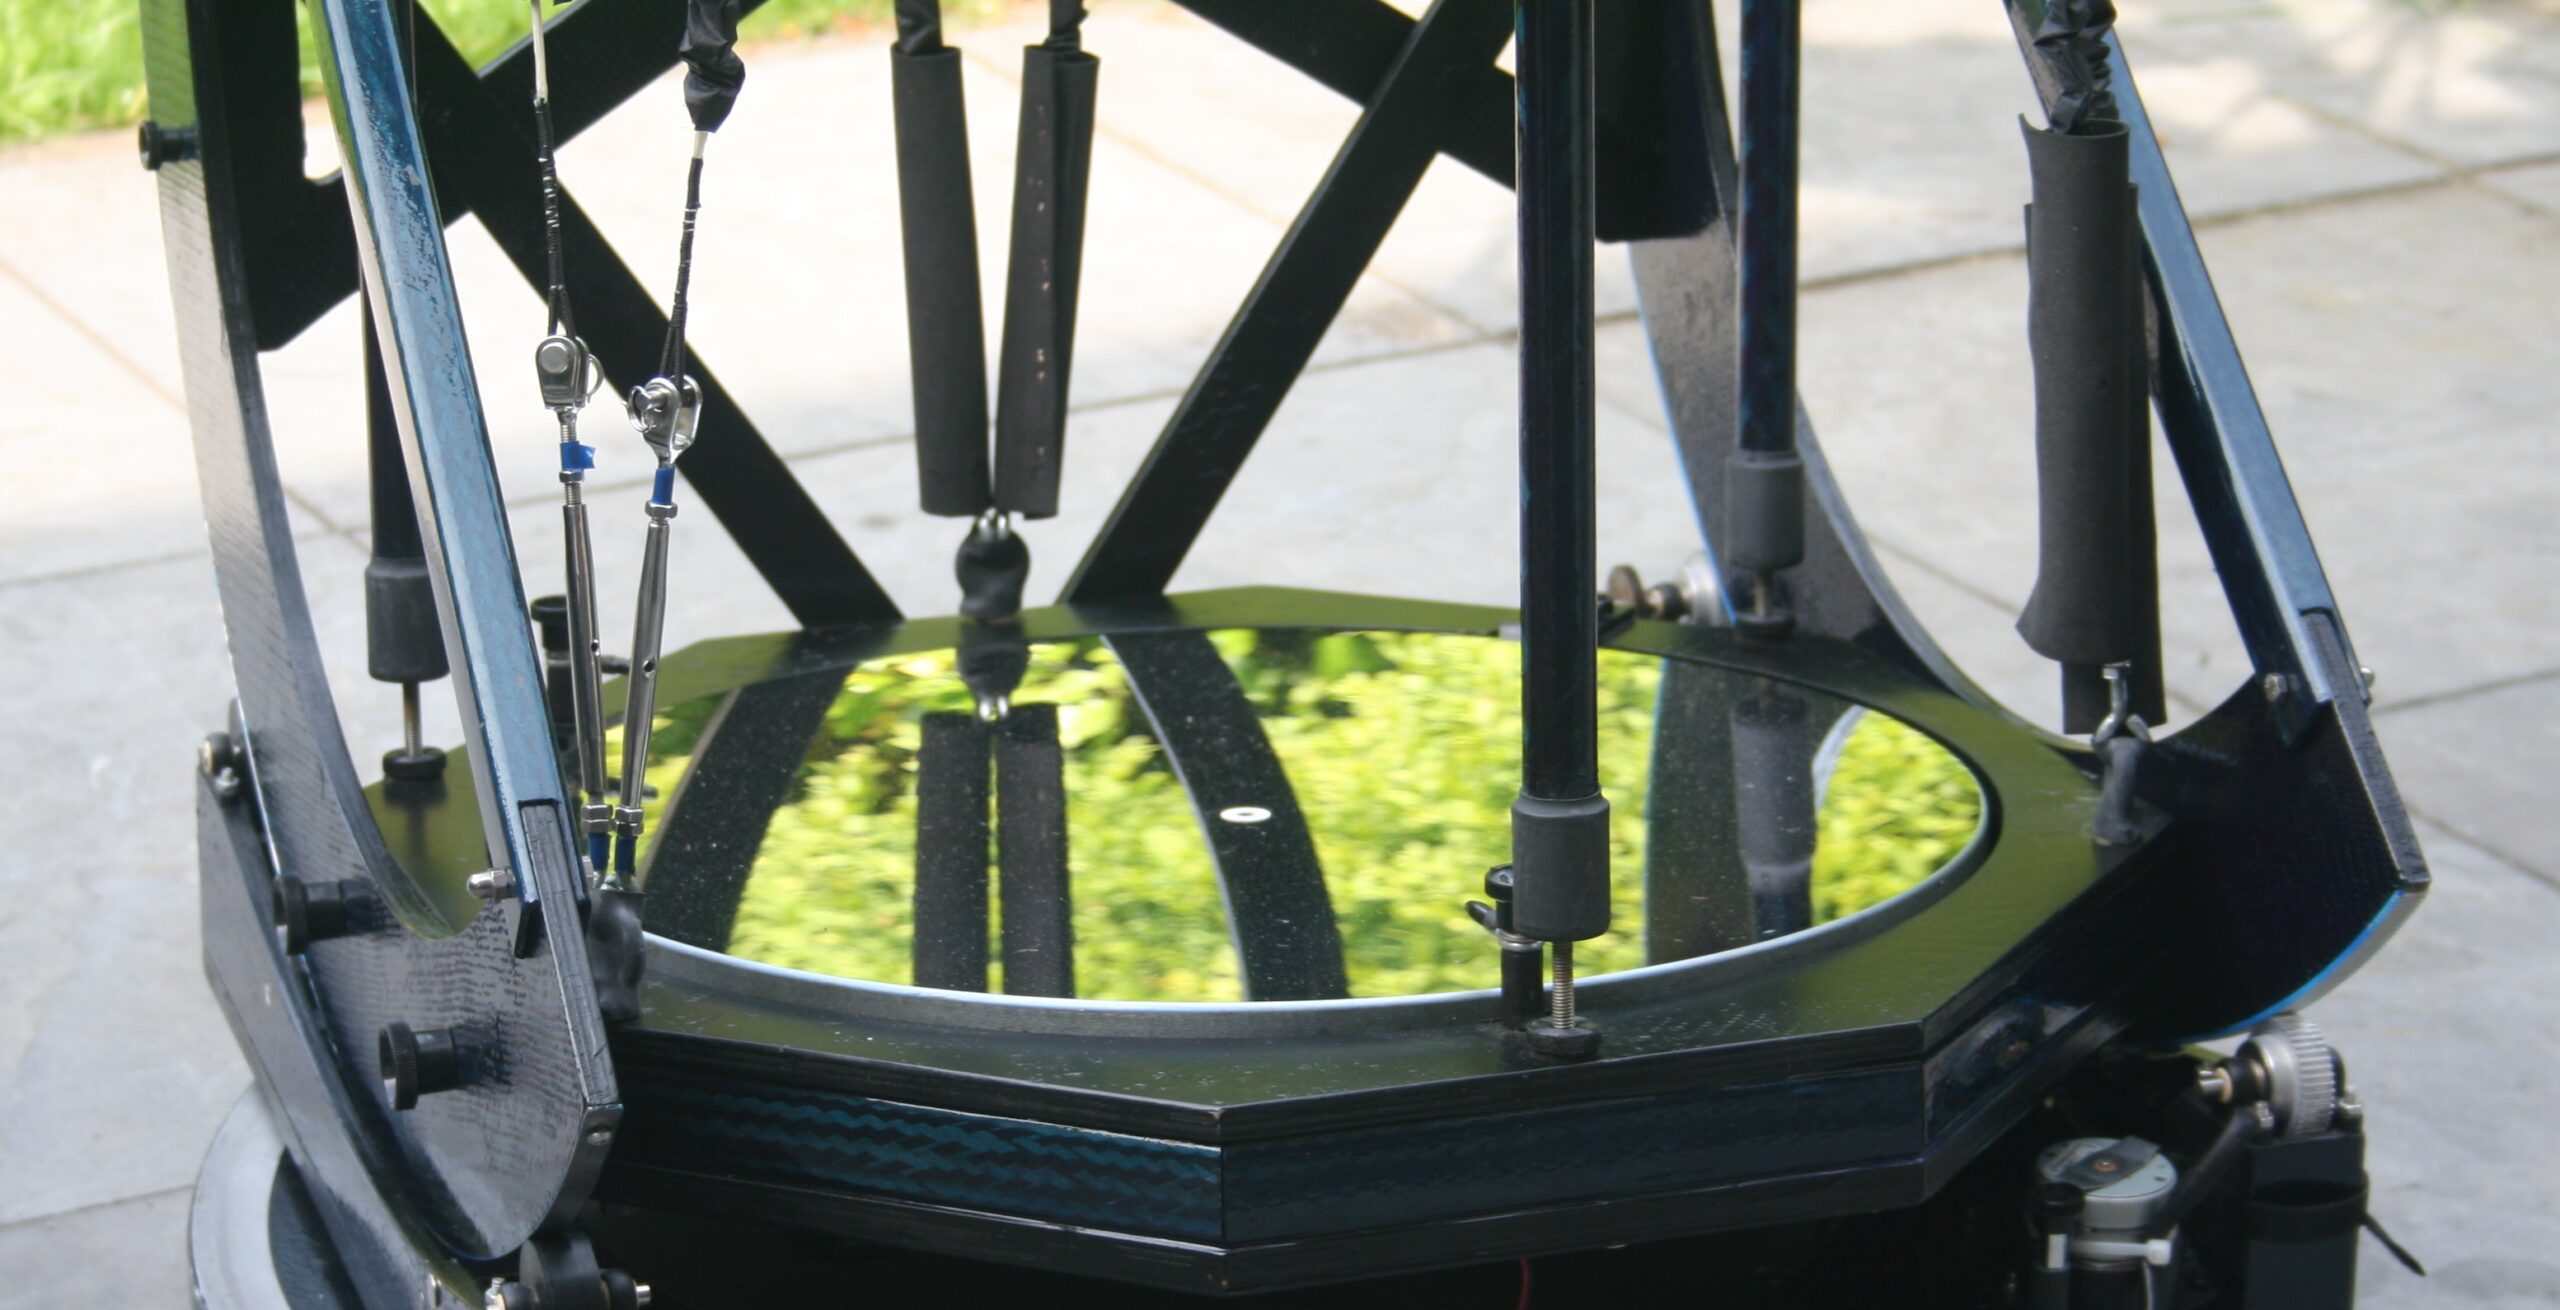
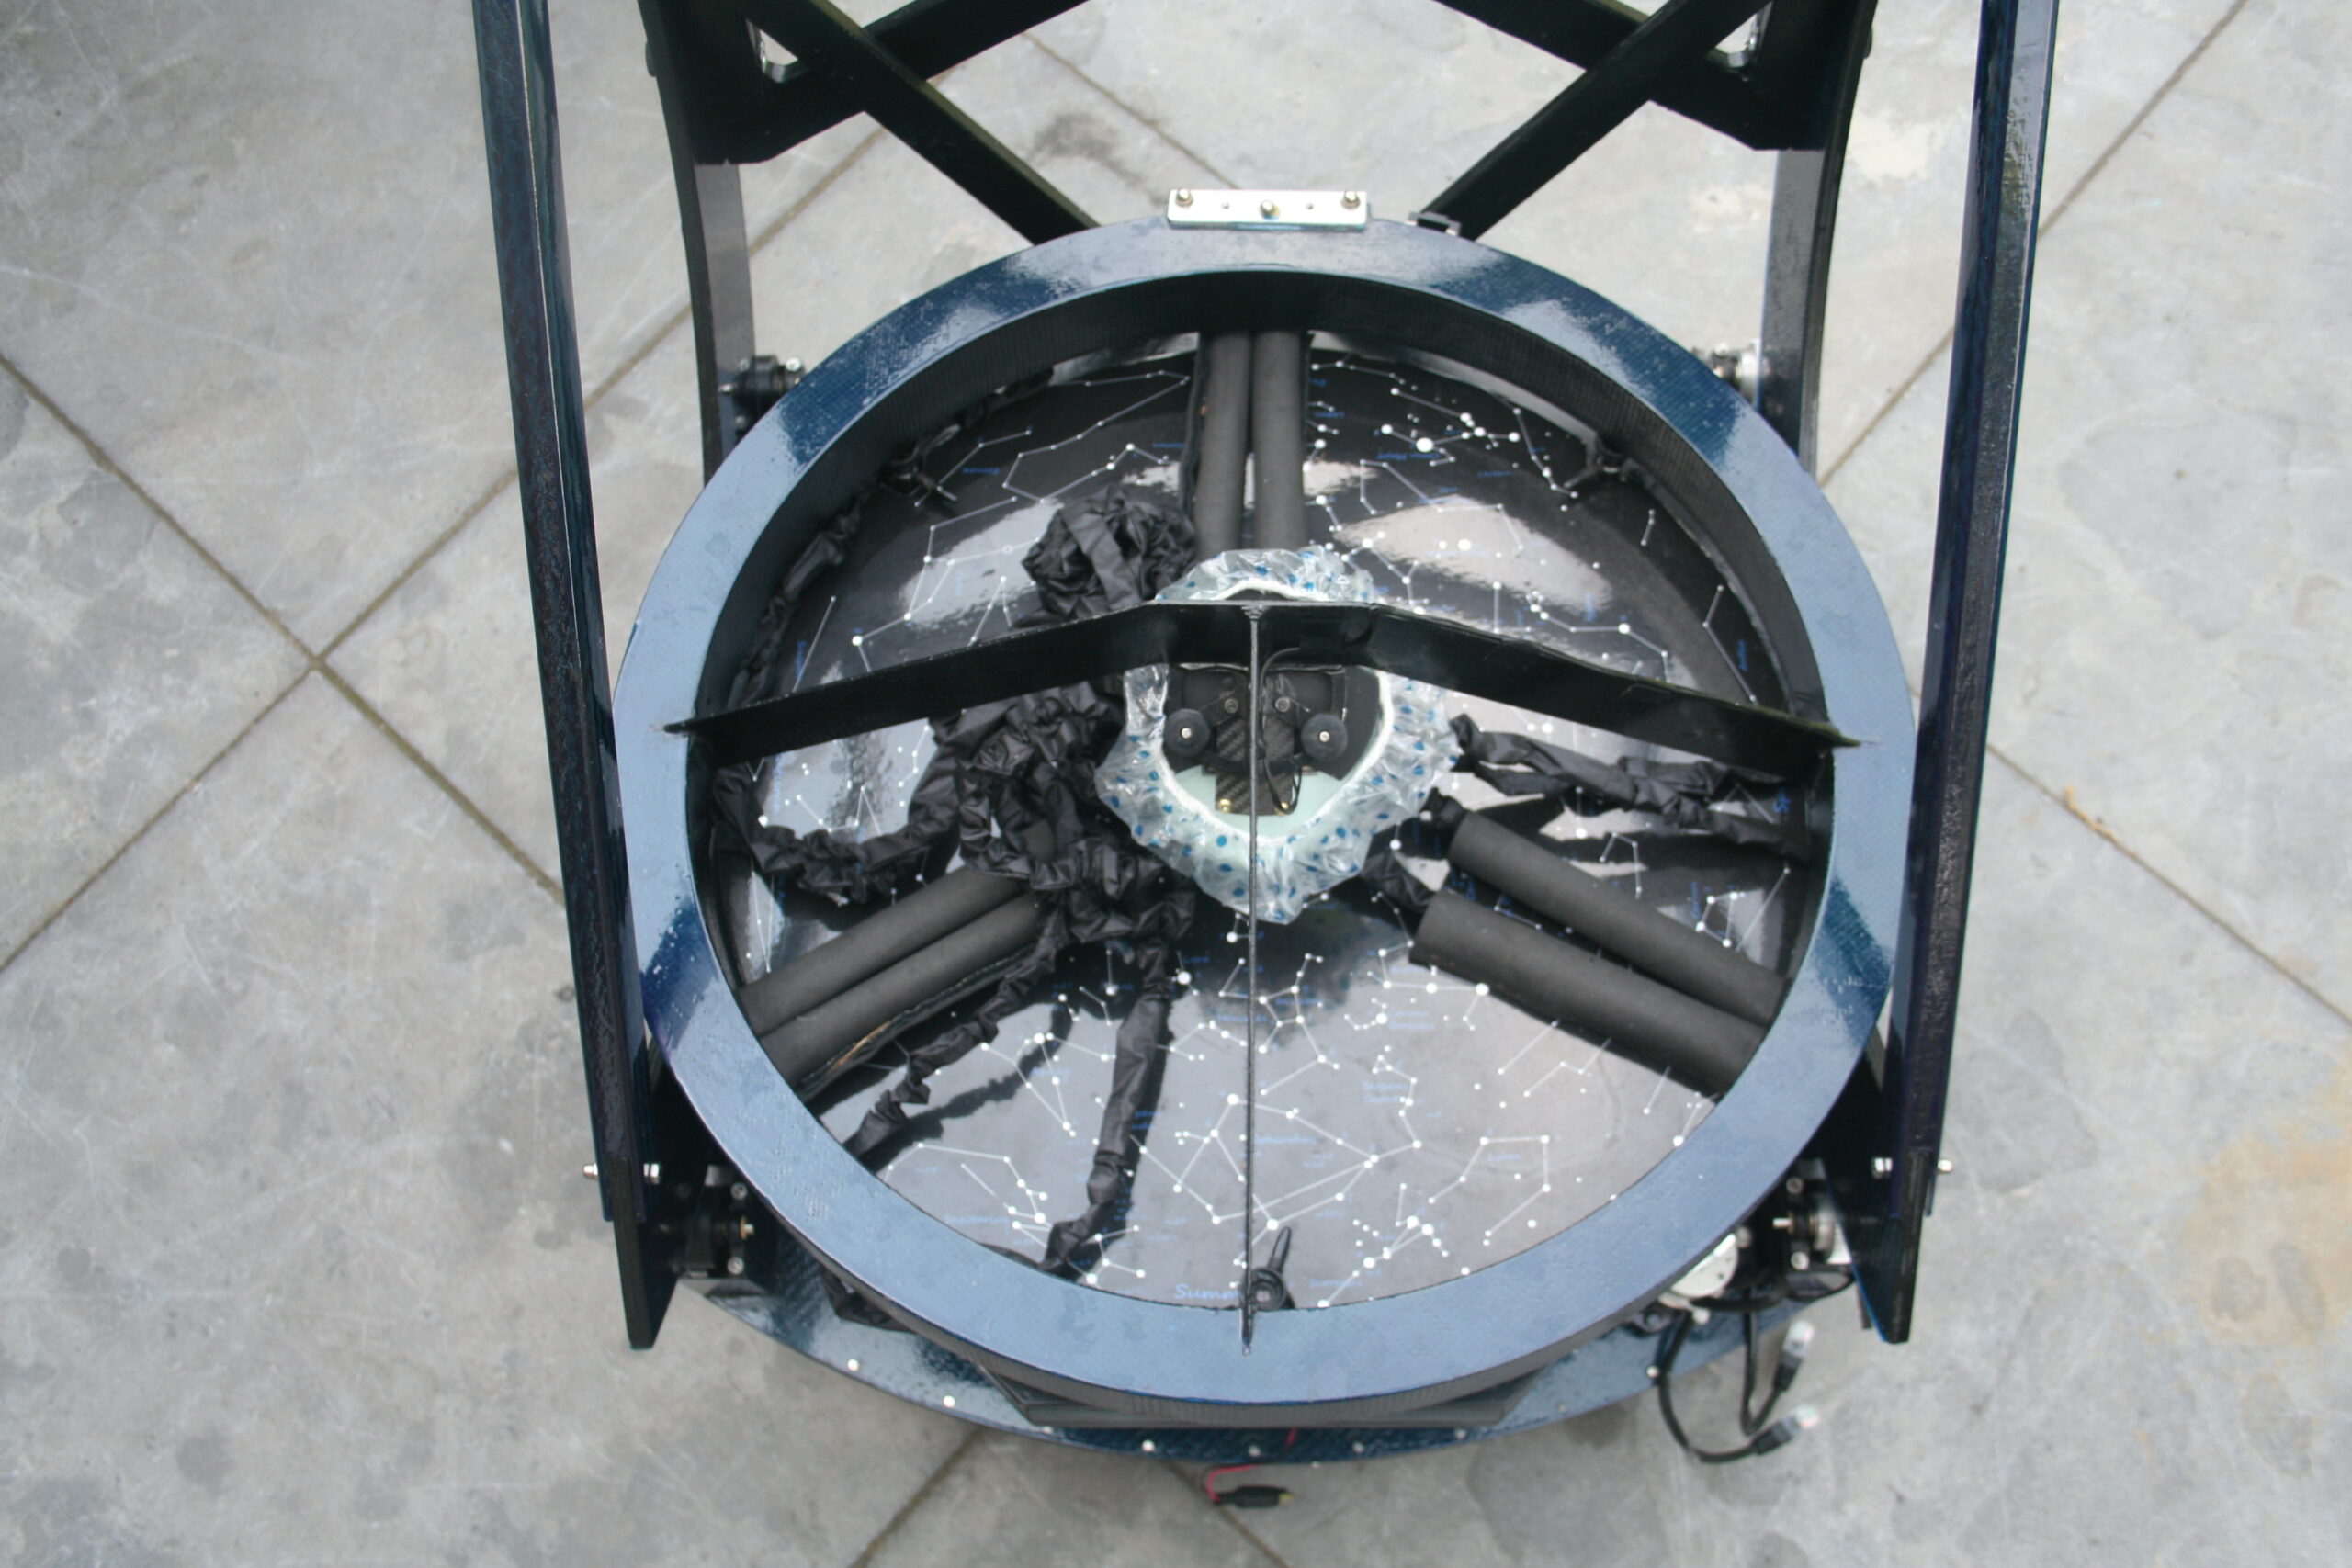
Sheathing that is made of nylon Ripstop is used to protect the strings. By bunching up this sheathing it also dampens any vibrations. Due to the use of different materials like carbon, wood, aluminum, the telescope has very little vibration. Since its completion in 2010 I have regularly observed objects with magnifications of more than 600x without any problems.
The poles are made out of carbon tubing. A threaded rod is fixed in the bottom end (see images in figure 22). This rod is placed in a hole in the mirror box. By unscrewing a bolt the pole raises to tension the strings. The method is preferable to using springs because the force created is constant and can be simply adjusted by screwing or unscrewing the nut. Aluminum strips were glued to the underside of the secondary ring where the poles and strings converge, to provide additional strength, thus alleviating pressure on the carbon ring (see images in figure 20).
Figure 20


>>>>Mechanics
[1] Instructions can be found on the internet, search for ‘endless bowstring jig’