
<<<< Version 3
Introduction
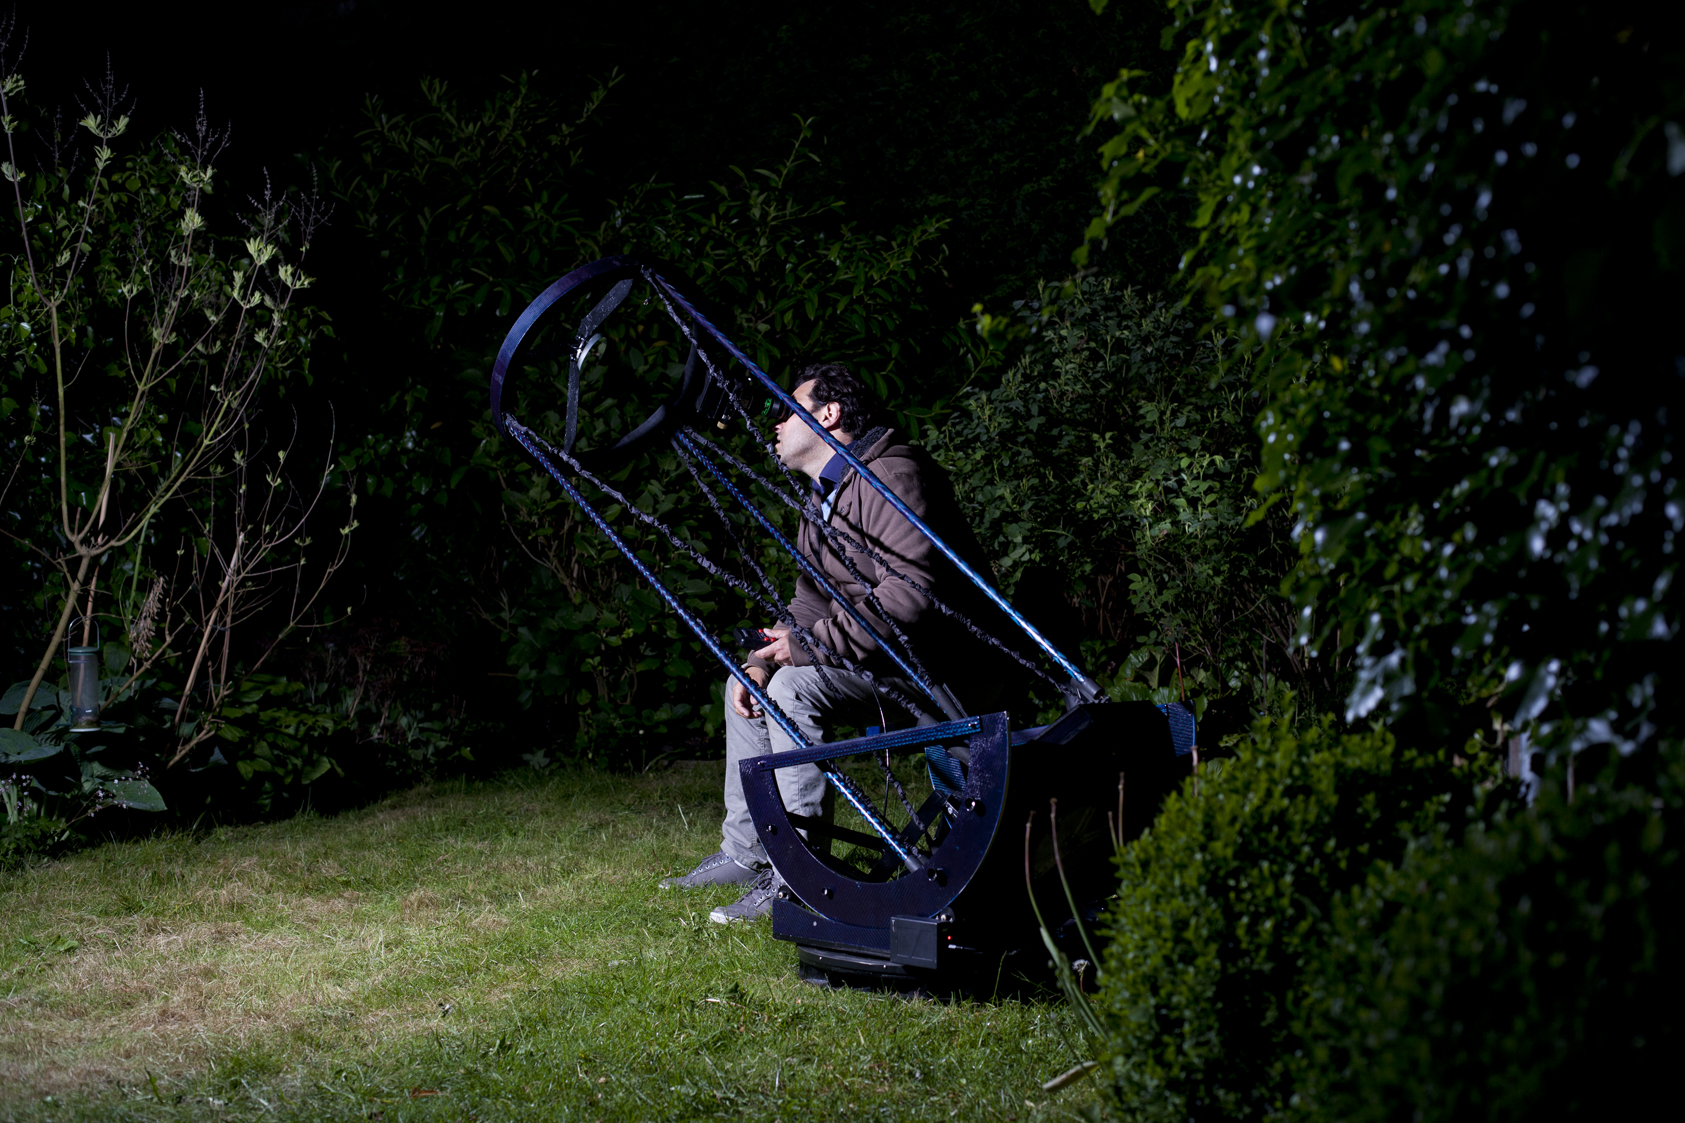
45 cm f4.6 String Telescope final version
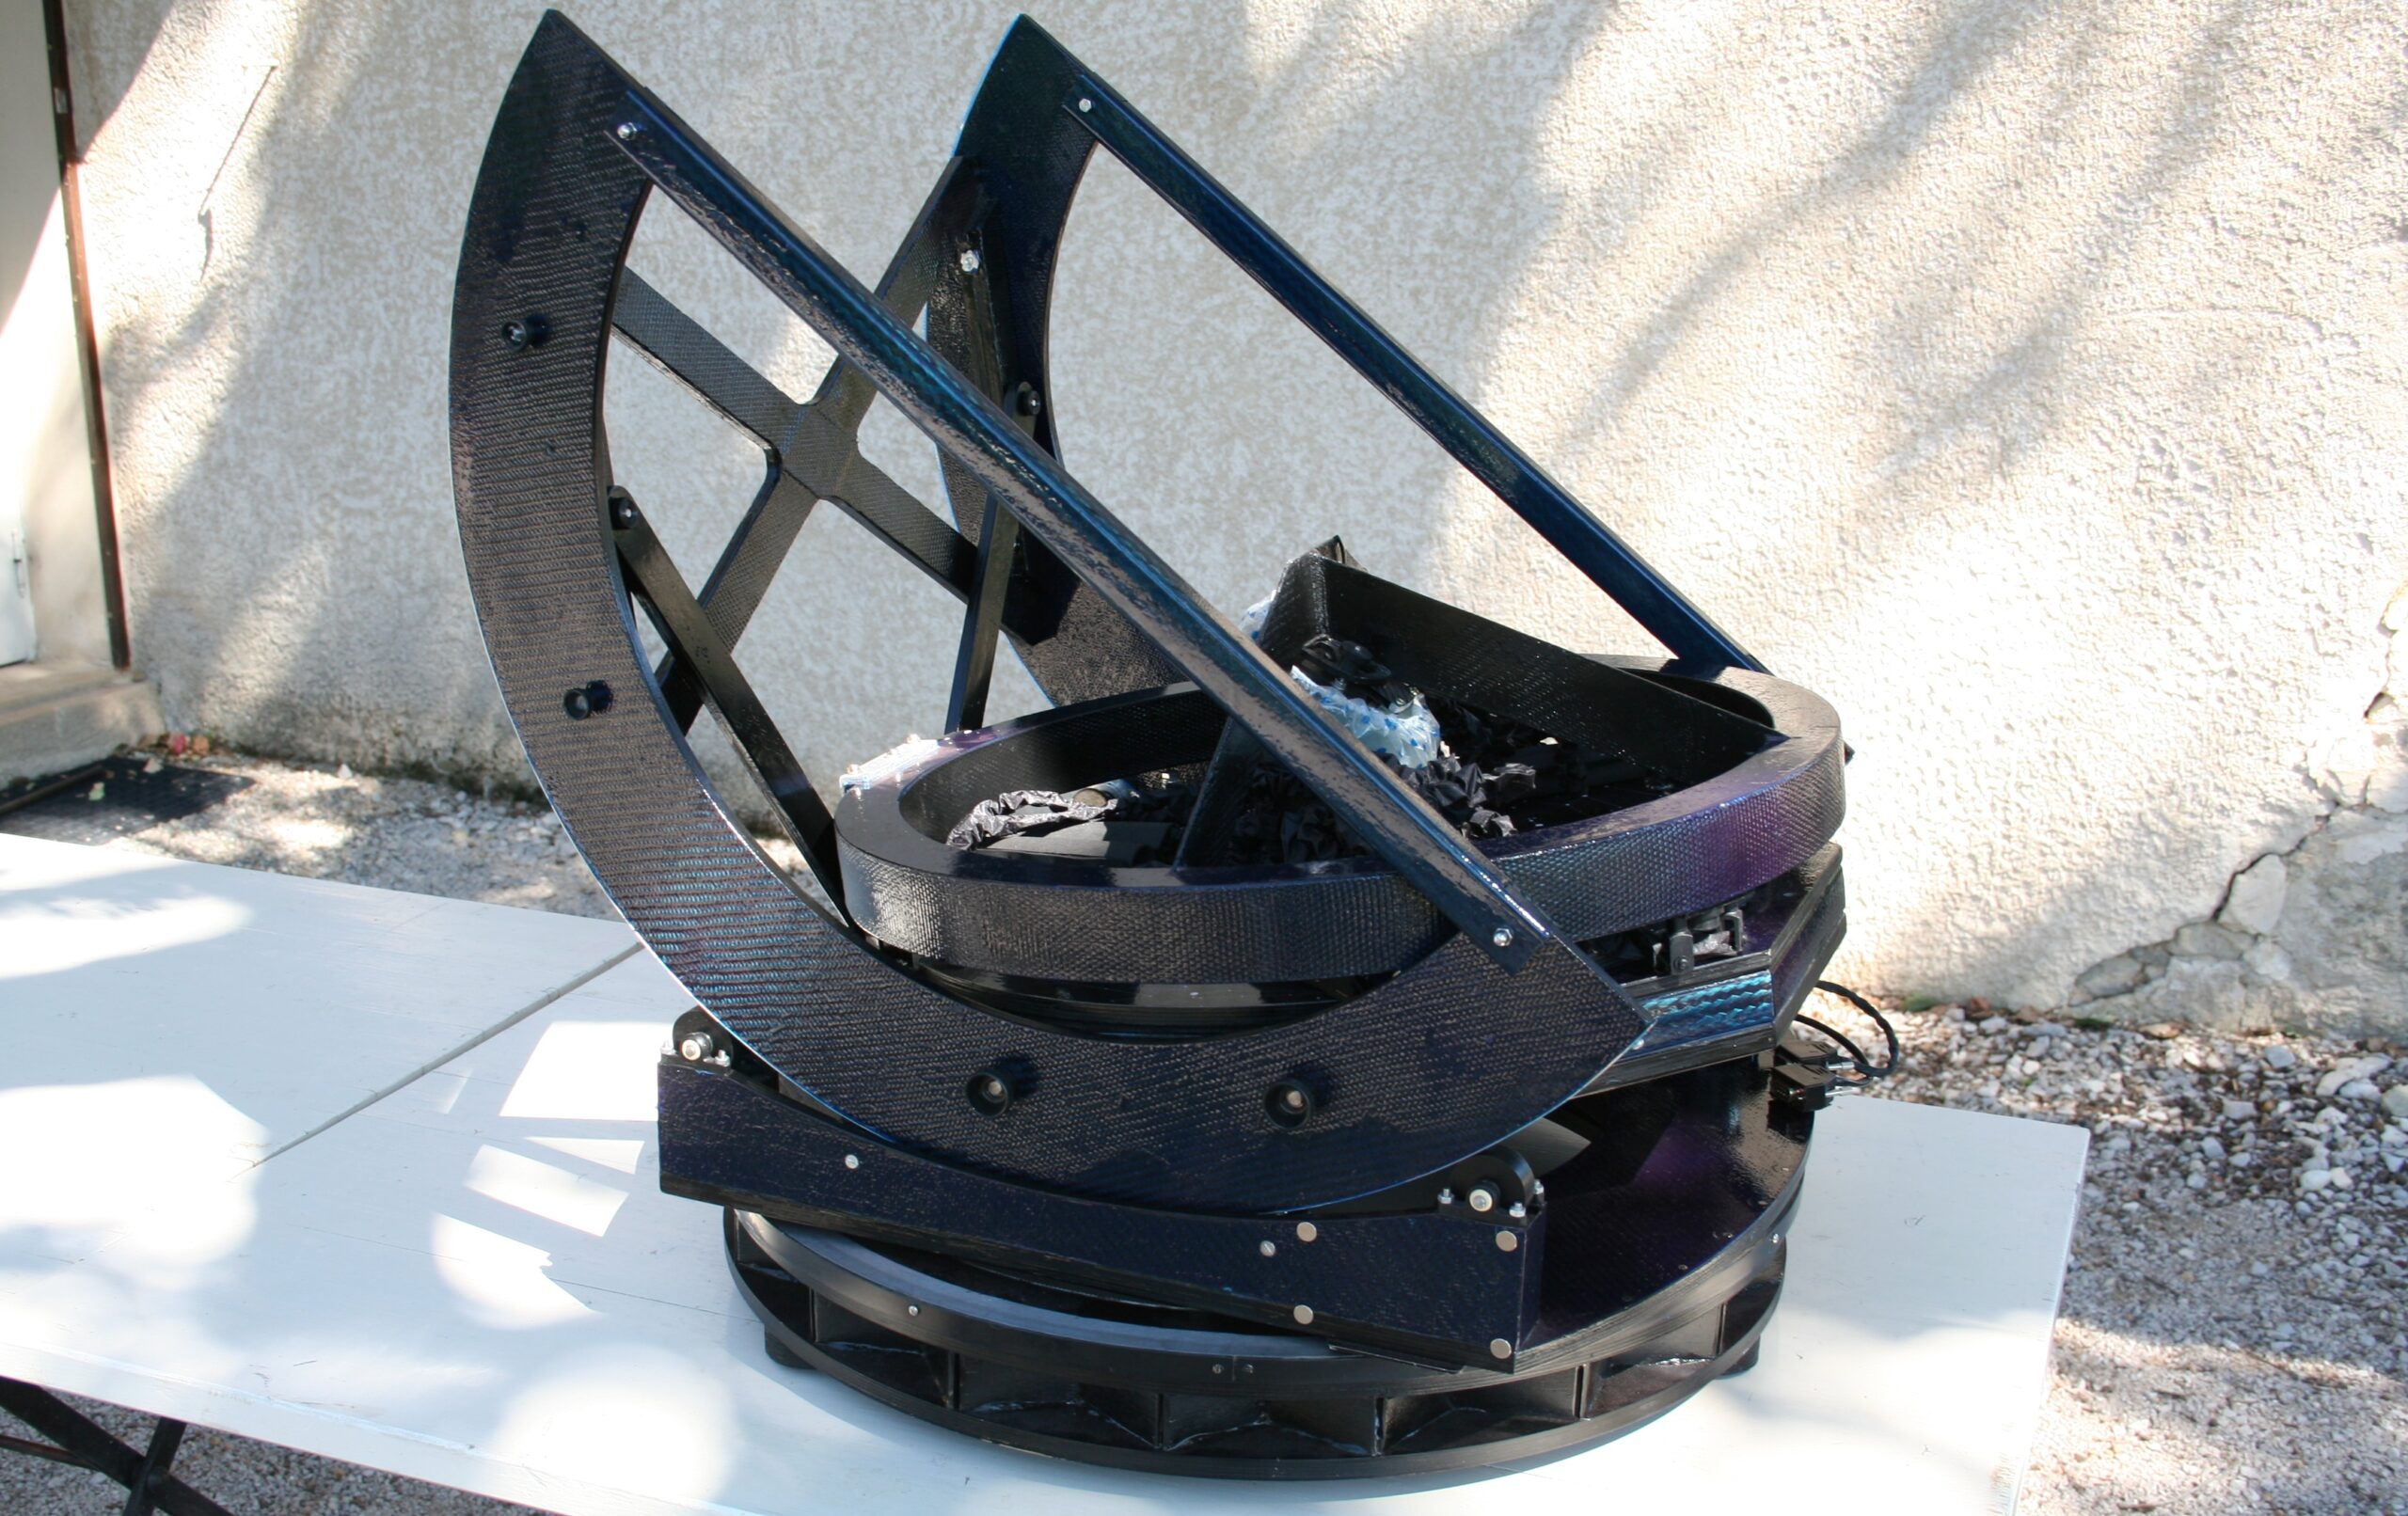
Although the 3e version of the 45 cm telescope I build in 2008 was a great telescope changes in my personal live (starting a family) dictated that I needed a different telescope. The main reasons for the rebuild were was the necessity for maximized transportability and usability of the instrument.
To achieve this I focused on four aspects of the telescope: compact design, quick setup of the telescope, lightweight components and a low eyepiece height. Since easy lifting of individual parts of a telescope depends largely on the size of the part, creating compact parts was the primary focus of the design.
This is slightly counter intuitive. One would think that the focus should be on light weight to achieve maximum usability. Over the years I found it isn’t a problem if a telescope is slightly overweight, as long as you can get a good grip on it to lift it. My previous telescopes had a mirror box that was very light but cumbersome to lift. It made transporting the telescope and setting it up unnecessarily difficult. Before designing the telescope, I outlined a set of objectives.
Objectives
- The footprint of the new telescope needed to be smaller. The base of telescope can be a large part and tricky to transport. I wanted to decrease the diameter from 80 cm to 60 cm.
- A compact mirror box, at least 10 cm narrower than the previous version.
- A more precisely manufactured telescope for improved tracking and Goto.
- Maximum eyeheight low enough to elimate the use of a ladder.
- All motors, the computer and the battery would be placed on the rocker so that no wires would be on the ground around the telescope.
- The telescope would also have a adjustable secondary mirror holder. On previous versions I would collimate by adjusting the strings and poles.
Design
To achieve the objectives a more precise method of building was necessary as compared to the previous telescopes I build. To achieve this I designed the telescope using Google Sketchup[1]. This program allows novice builders to quickly and easily draw a telescope in 3D (see figure 1). It is much less complicated than other CAD programs and has the added advantage that it is available as freeware. It would have been difficult to calculate the dimensions for my telescope in 2D and still make every part as compact as possible.
Figure 1 the sketchup model in “x-ray” view
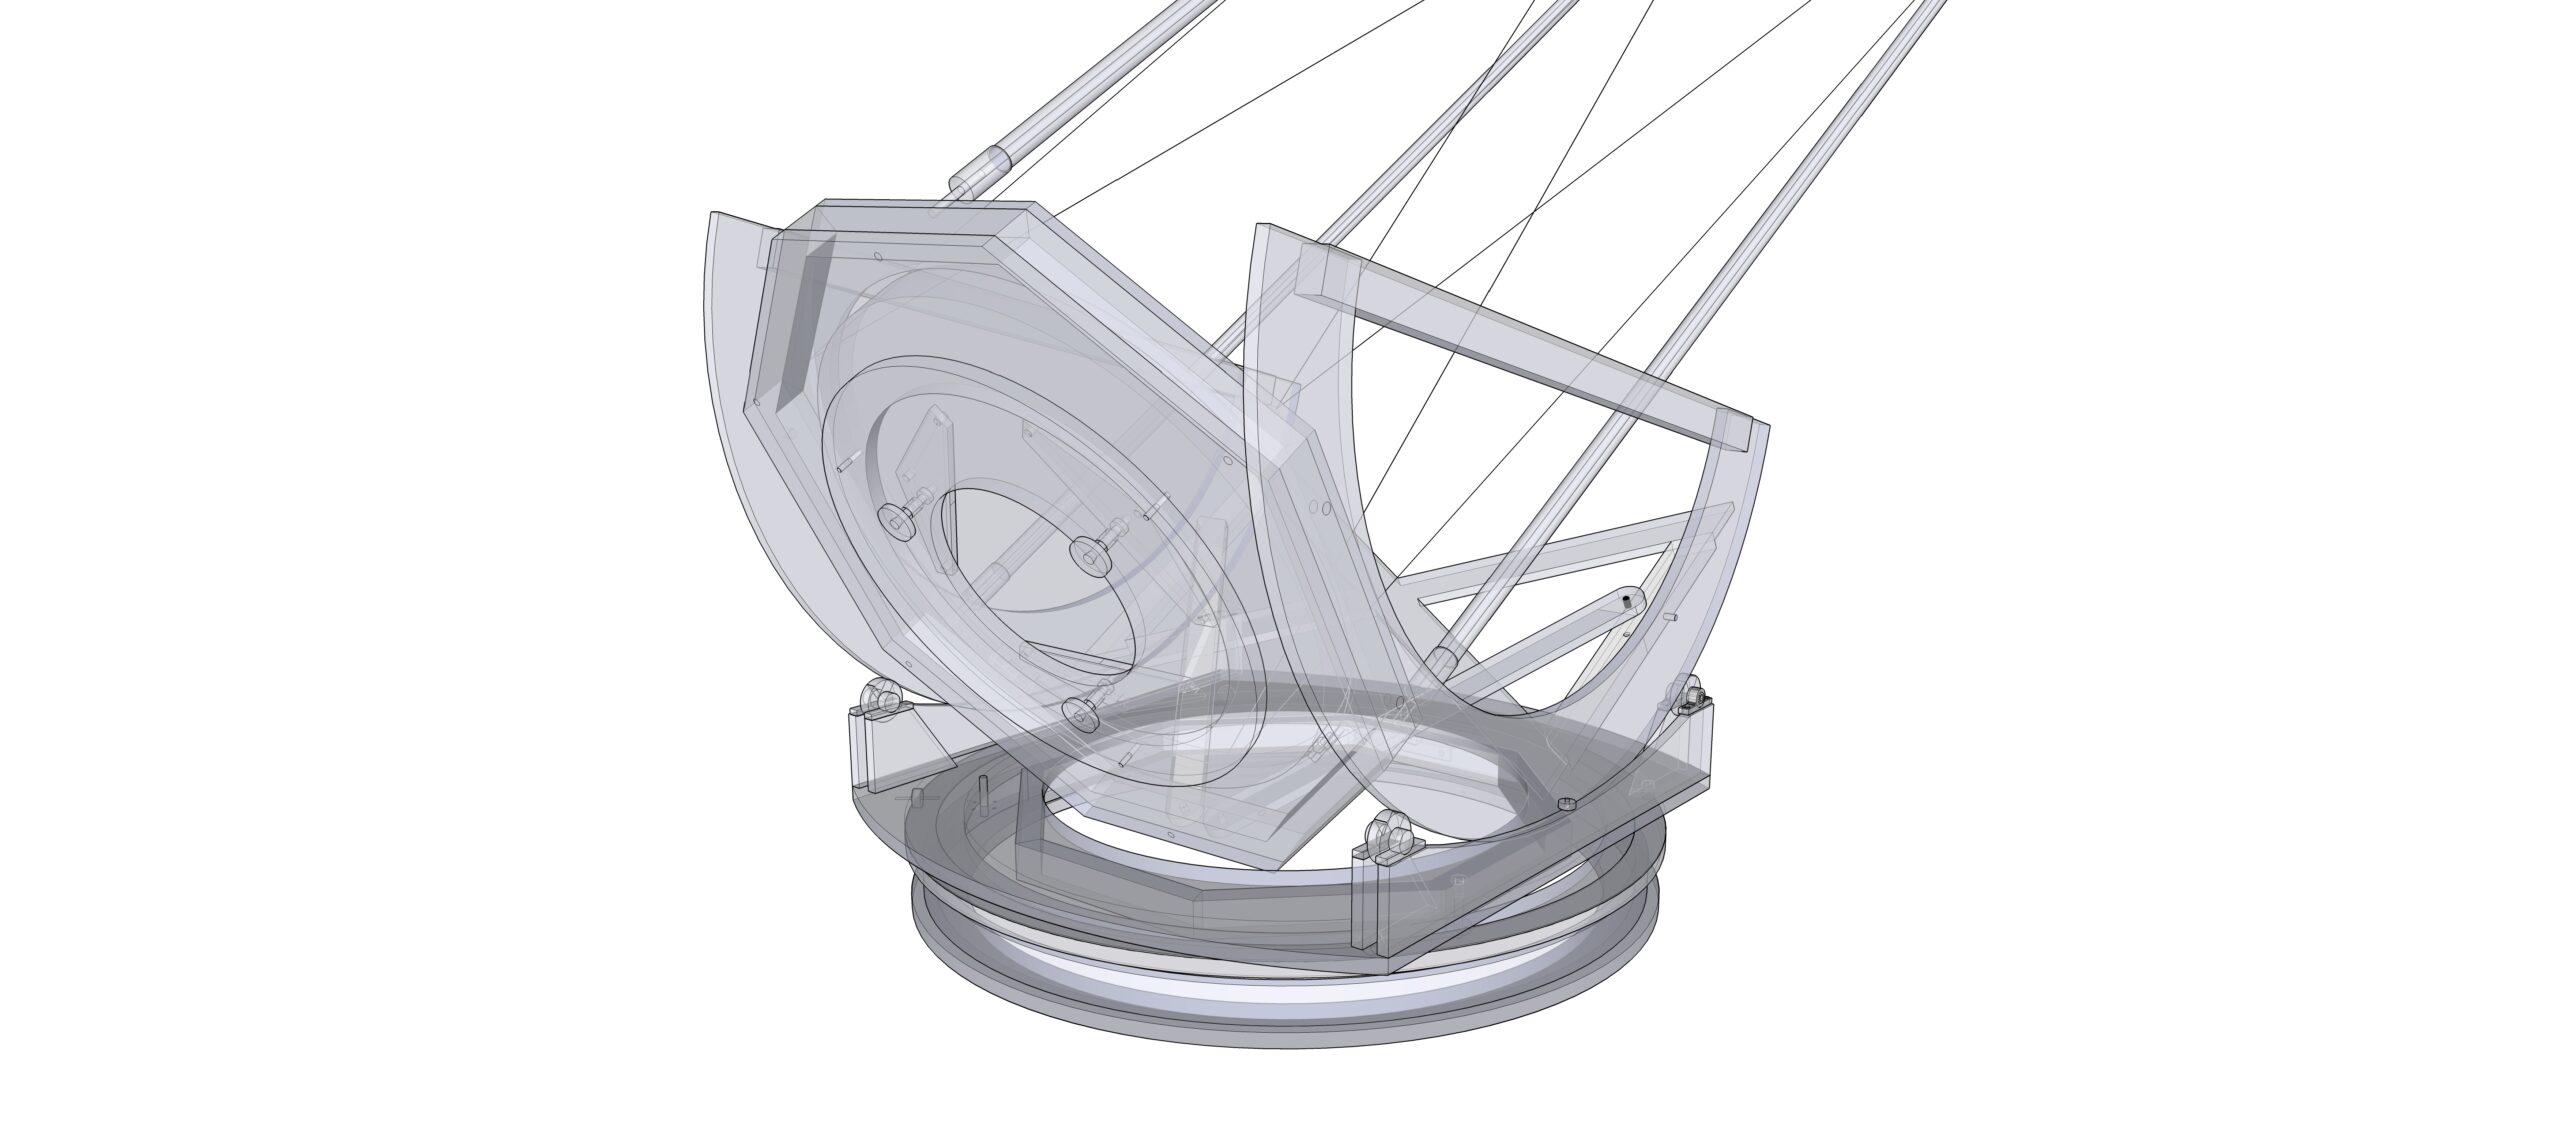

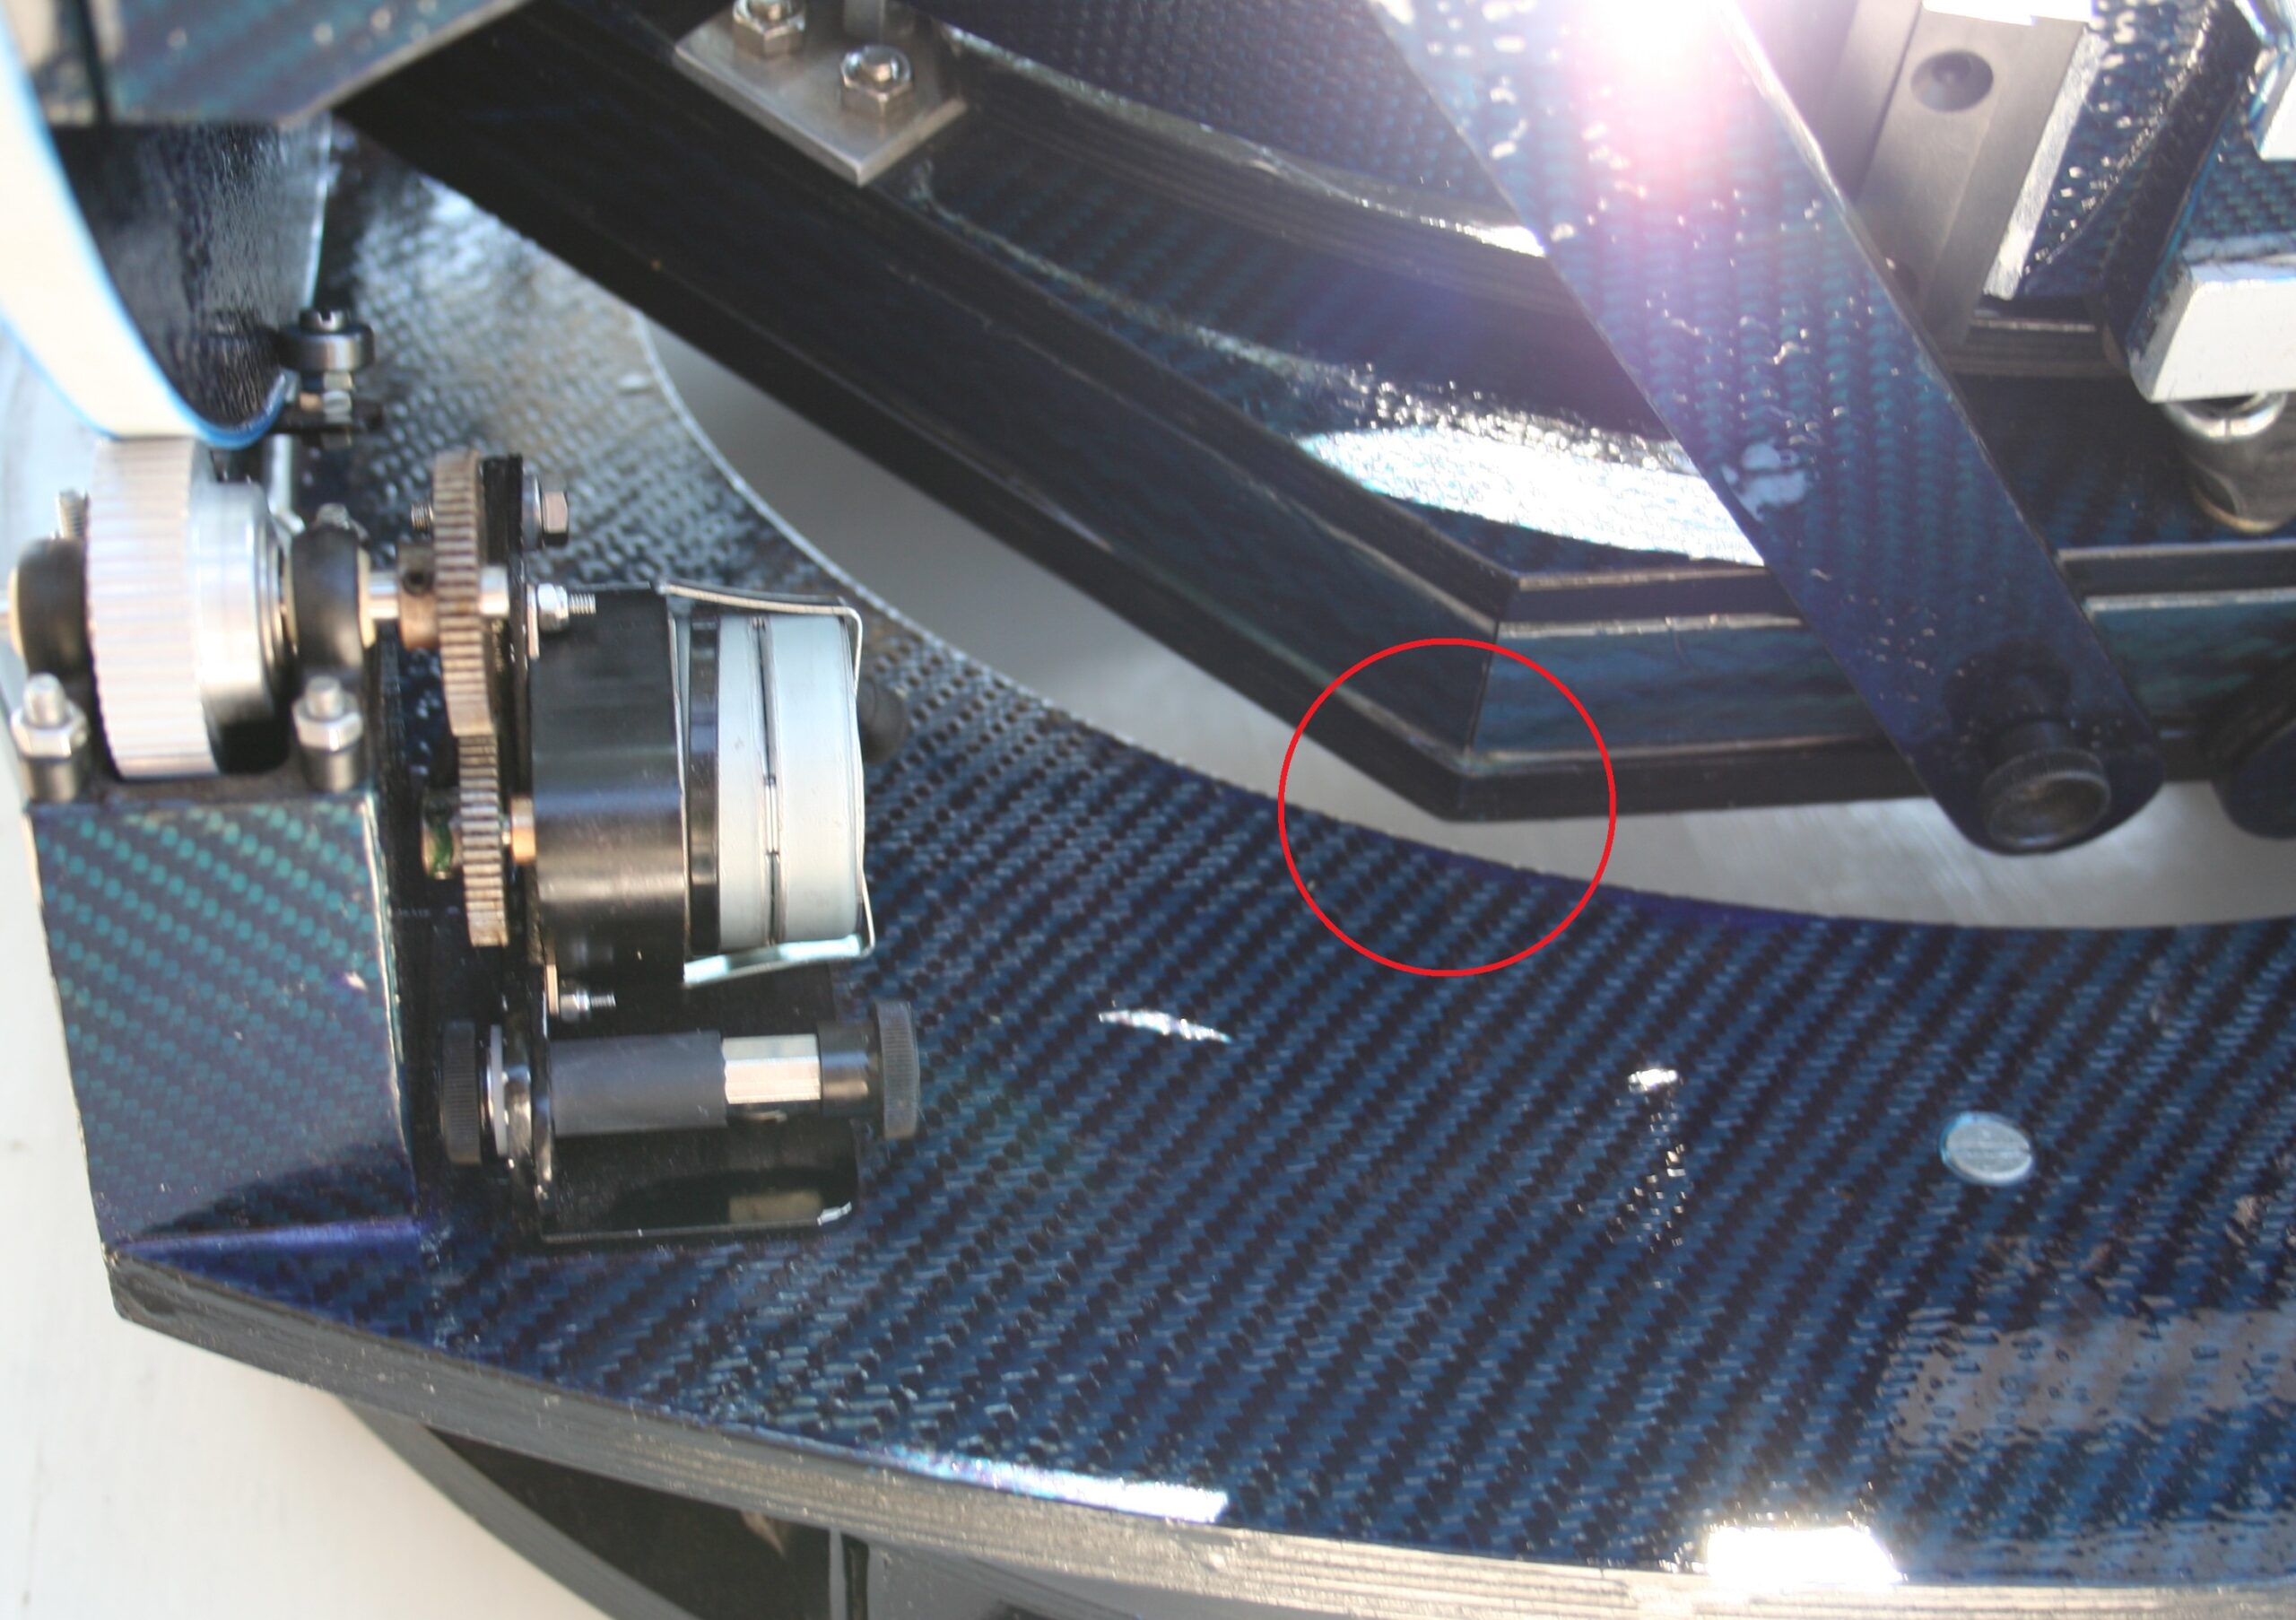
Sketchup gave me the ability to experiment with different designs without having to build them. It also allowed me to achieve tighter tolerances in the design. One example of this is the amount of clearance between the mirror box and the rocker as the telescope rotates in altitude (see figure 2). Another example of the usefulness of 3D design is the position of the secondary ring during transport (see figure 3). It would have been near impossible to calculate whether or not the ring could be placed on the mirror box without using Sketchup.
Figure 2 the mirror box missing the rocker by 5 mm
In learning to design a telescope with Sketchup I found three things invaluable. Firstly I looked at many YouTube clips about using Sketchup. There are a lot of video tutorials on the internet that help you get started in minutes.
Secondly, I would advise users to save their designs frequently. I saved my files with every change I made to the design. Just before I started building the telescope I had more than 50 files, giving me a record of every stage of design. This made it much easier during the design stage to go back to an earlier design when a component did not seem to fit.
Thirdly I would advise the use of layers when designing a telescope. I used a layer for every individual component. This allows you to test out different solutions within the same 3D model. For instance two different secondary mirror setups that you can toggle on and off to see which one works better.
Figure 3 The telescope in its “stored” position
Two downsides to working with Sketchup are worth mentioning. Sketchup files (at least not from the version I used) do not easily export to files (.dwg, .dxf, .step). These are usually the type of files that can be used when ordering parts from machining firm or that can be used with a CNC machine.
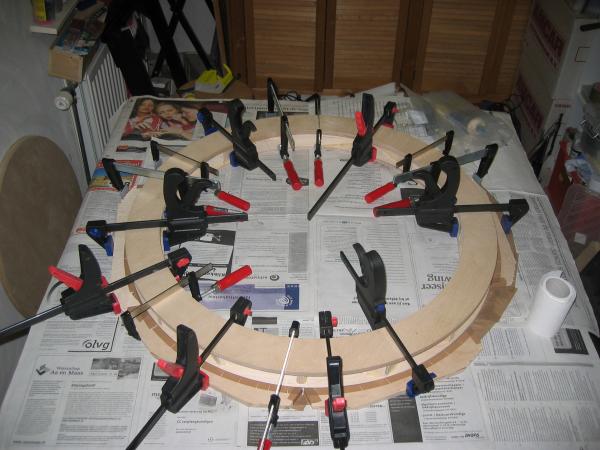
Secondly, it is not possible to use a Sketchup 3D model to do complex calculations. For instance calculating the center of gravity of the model or calculating the amount of flex in trusses or other parts is not possible in Sketchup. Since I wanted to have the wooden multiplex parts of my telescope machined by a woodworking firm, I had to redraw them in 2D in another program.
>>>>The string concept
[1] http://www.sketchup.com/intl/en/